Starting a tech blog can be a lucrative investment and an easy way to connect with global audiences.
However, it’s crucial to recognize that the blogging landscape has grown more competitive. Simply creating a tech blog and pouring random thoughts into it won’t cut it anymore.
This free masterclass will provide you with the necessary information to start a successful tech blog this year.
I’ll talk about why you should start a blog, what you can expect from a blog, how to attract and retain readers, how to make money, and more.
About me: I’m Artturi Jalli, the founder of codingem.com—a tech blog with 5M+ visitors.
I’m excited to share with you how this can be done!
Please note that this post contains affiliate links, but there is no additional cost to you.
Tech Blogging 101
Many claim that blogs are dead. But they’re not. This is especially true with tech blogs.
With amazing new tech trends arising, it’s a blog type that’s everything but dead!
But while tech blogs can thrive, there’s also fierce competition.
These days, anyone can start a blog in 30 minutes.
Thus, having a tech blog is not enough to make money. Instead, it requires strategic and hard work.
You need to write about topics that are relevant and interesting in the tech space.
To grow your blog, you should treat it like a business—not a hobby!
Thus, you need to write blog posts about topics that people are searching for on Google.
To give you a better image of what blogging/tech blogging is these days, here’s an expectation vs. reality chart.
| Expectations | Reality |
|---|---|
| ❌ Write 2-4 posts per month | ✅ Write multiple blog posts every day |
| ❌ Publish 200-300-word posts that will go viral | ✅ Write >5,000-word ultimate guides |
| ❌ Work 5-10 hours a week | ✅ Work 50+ hours a week |
| ❌ Build a solid audience in a month or two | ✅ Get no visits in the first 6 months |
| ❌ Earn passive income | ✅ Work for 1+ year without making anything |
Before investing time into blogging, I highly recommend getting these straight.
It’s a long grind. It’s more like a marathon and less like a sprint.
But for example, for me, it has been life-changing.
With all this being said, blogging is one of the “easiest” businesses to start.
Basically, there’s no initial investment.
All you need is time.
Also, with the right strategies (will teach these today), you have a high chance of becoming a successful blogger.
Why Start a Tech Blog?
1. Show Off Your Skills
Do you have tech knowledge?
Share it!
A blog is a perfect place to help people with quality blog posts that solve problems.
For example, I wrote a ton of coding articles for my tech blog to save developers time.
Also, I wrote a ton of tech product reviews.
2. Help People Out
With your blog, you can break down tough topics and guide readers through the tech world.
You can share takes on the latest tech trends, review products, or teach how different tech-related things work.
3. Always Be Learning
When you write about tech, you learn more.
It’s a win-win!
When I wrote blog posts about programming languages, I always learned a ton of new things that I hadn’t realized before.
4. Earn Some Cash
Once your blog picks up, there are ways to make money.
Think ads, partnerships, or selling stuff. Start small and see where it takes you! Some tech blogs become big tech review sites worth millions of dollars.
But this requires a ton of hard work and growing the blog like a business.
Own Blog vs. Platform
If you’re completely new to blogging, Medium.com can be a good starting point.
It’s a platform that allows you to just sign up and start writing.
You can literally do this in 2 minutes.
Write a couple of tech-related blog posts on Medium to see if it’s actually your thing.
I also started on Medium. Once I had a bunch of stories go viral, I decided to launch my own blog.
In hindsight, I should’ve started my own blog much earlier. But I guess I wasn’t sure whether I’d like to do it full-time for a long time.
Also, if you really like it, there’s nothing wrong with sticking with Medium.
It has a big built-in audience for tech-related topics.
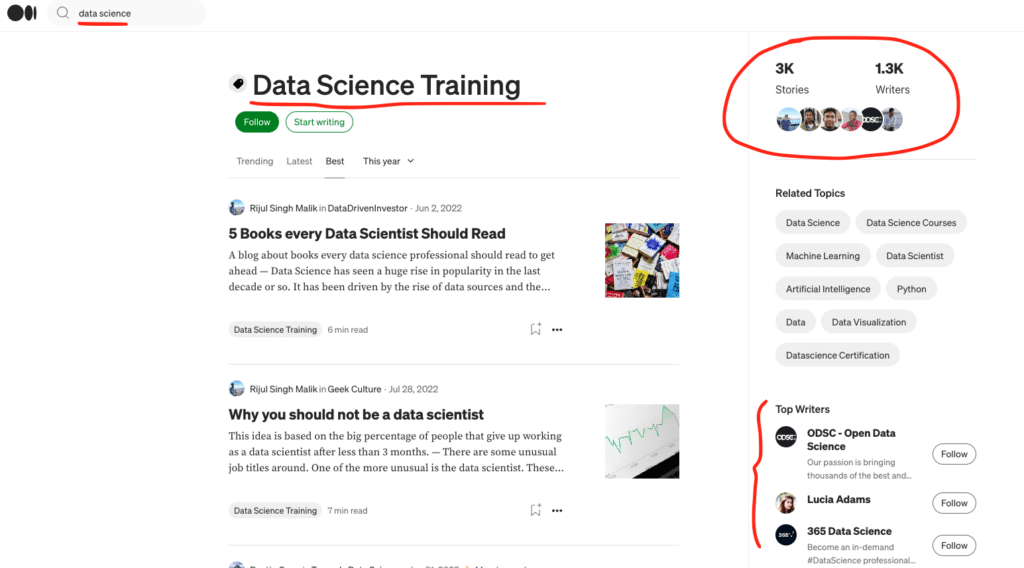
On Medium, catchy short posts on hot topics often do well and can even go viral.
However, Medium is more like social media where readers scroll feeds for recommendations, so your post’s popularity is short-lived.
In comparison, if you rank high on Google with your own blog, your posts can stay relevant for years.
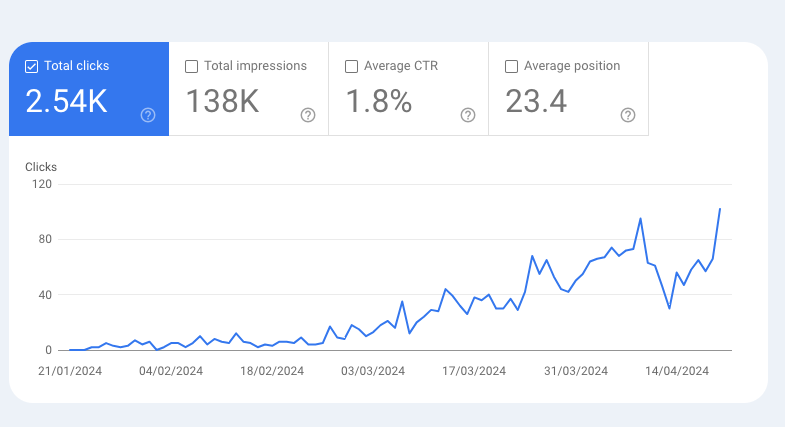
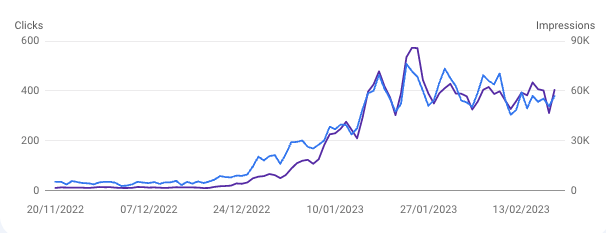
For example, here’s a chart of my personal blog that me and my mates started a while ago.
We completely ditched it but the traffic kept on growing.

But on your own blog, you need to focus on writing long-form content that’s “designed to rank” on Google.
On your own blog, it also takes longer to grow.
It can easily take 6 months before seeing any significant traffic.
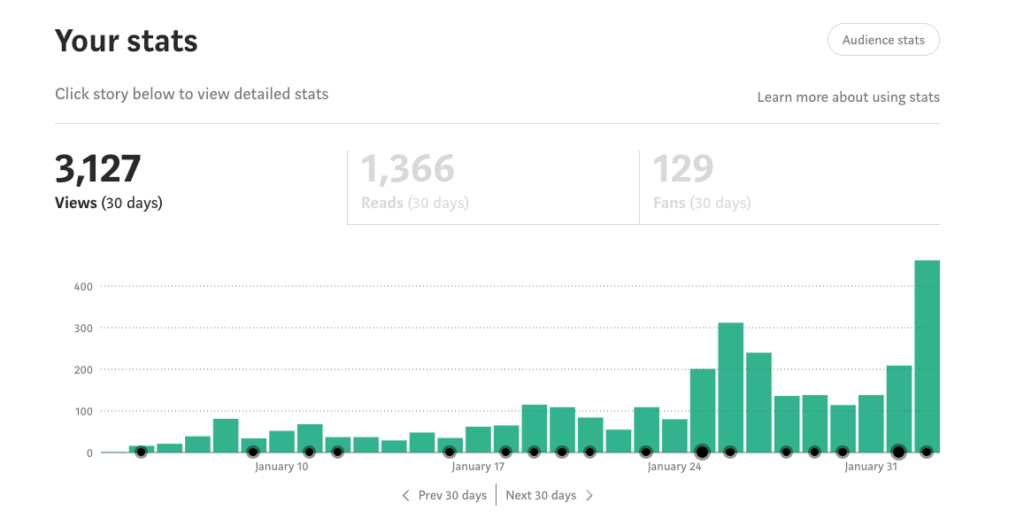
To highlight this, let’s compare how my Medium blog performs against my own blog.
On Medium, I got 3,000+ reads in my first month (as a first-time blogger).
But on my own tech blog, I got just 12 visitors during the first month.
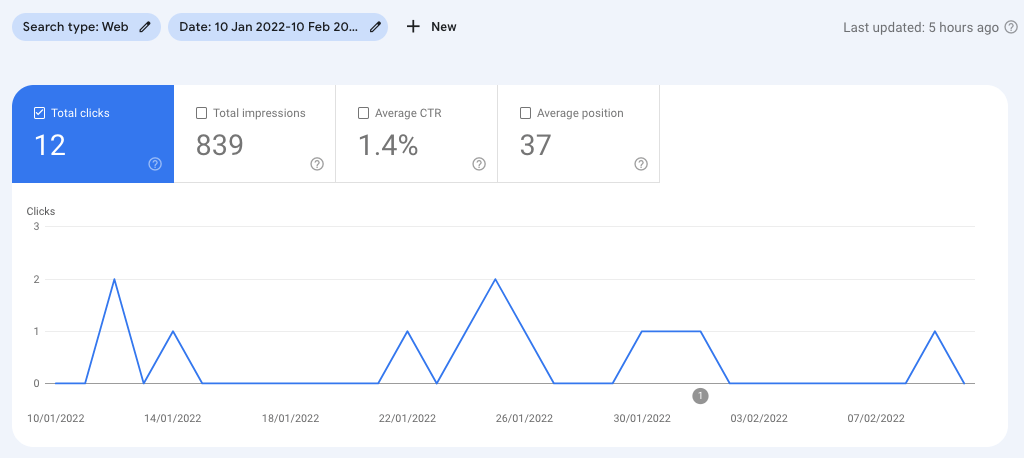
And this is good. Some blogs might go without visitors for months.
To give you a better idea of where to start, let’s compare your own blog to a platform like Medium.
Pros & Cons—Own Blog
| Pros | Cons |
|---|---|
| ✅ Full control/ownership over content | ❌ No audience to start with |
| ✅ Keep all the earnings | ❌ Some technical responsibilities |
| ✅ Easy to get started | ❌ Domain and hosting fees |
| ✅ Opportunity to build a strong community and brand | ❌ Longer grind |
| ✅ Massive growth potential | |
| ✅ Great earning potential |
Pros & Cons—Blogging Platforms
| Pros | Cons |
|---|---|
| ✅ Audience exists | ❌ No control over posts |
| ✅ Super easy to start | ❌ Audience doesn’t remember you |
| ✅ No technical responsibilities | ❌ Big revenue share with the host |
| ✅ Publishing usually free | ❌ Affiliate marketing limitations |
| ✅ Publishing is usually free | ❌ Themes and designs are rigid |
| ✅ Going viral is possible |
💡 If you’re serious about blogging, I recommend starting your own tech blog right away!
But if you aren’t sure, just sign up to Medium and give it a try. This way you can get a good idea of how it feels like to write blog posts.
To start blogging on a platform, I recommend trying Medium.com—it’s the best-known blogging platform with a huge built-in audience.
👉 Important: To start on Medium don’t read any further but instead, continue to my post How to write on Medium.
But if you want to start your own tech blog, keep on reading this one!
How to Start a Tech Blog
This section is a step-by-step guide to actually building your tech blog.
Basically, we’re launching a good old WordPress blog.
After following these steps, you have a fully functional website and domain where you can start writing blog posts.
Keep in mind that there are some simpler alternatives. But choosing WordPress is the best decision in the long run.
With a quick solution like Wix, you can save 15 minutes. But then you’re heavily restricted when it comes to scaling/customizing your tech blog.
WordPress gives you room to expand your blogging business like no other. Thus, it’s a winner’s choice!
1. Pick a Sub-Niche
Choosing a blogging niche is an important decision that can impact the success of your tech blog.
But wait a minute?
The niche is already there: It’s Tech, right?
That’s true, but to find success, you need to heavily narrow it down.
Tech is a competitive and broad niche.
You need to find a sub-niche, such as a computer hardware, AI software, etc.
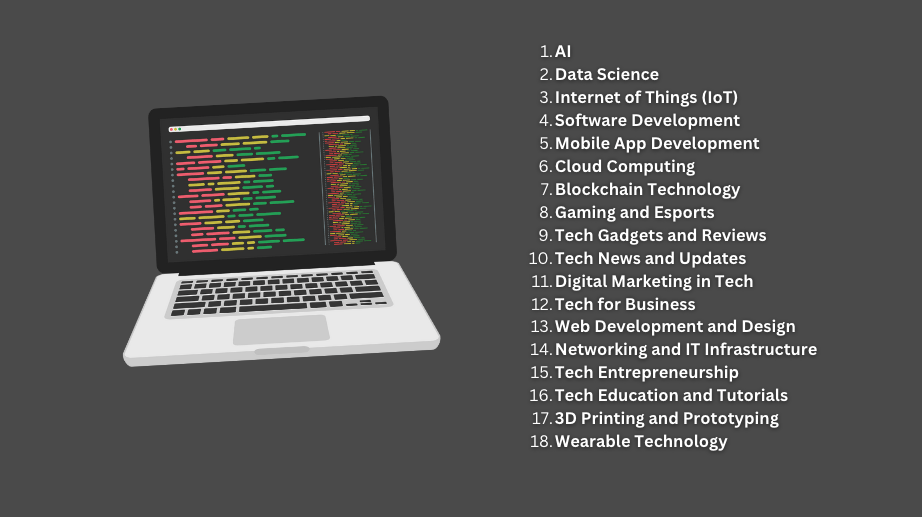
Let me show you how to find a perfect sub-niche for your tech blog.
1) Discover Sub Niches to Consider
The key to success in tech blogging lies in the sweet spot between passion and money.
Here are some ideas for discovering sub-niches in the Tech space.
#1 Avoid Overly Competitive Niches
While it’s tempting to jump onto trending topics, saturated niches can drown your voice.
Instead, find gaps in the market. Try to find emerging technologies or areas of technology.
For example, I found a ton of success by writing blog posts about AI writing and image-generating tools in 2022.
That was the time when AI was booming and not many sites had written about it yet.

On the other hand, think about something like Crypto.
That’s a super competitive niche and there are only those big companies high in the search results.
#2 Skill and Passion Drive Content
What truly excites you in tech?
Do you love coding?
Are you into hardware?
Or do you perhaps like testing and reviewing tech products?
Enthusiasm and first-hand experience are keys to success.
While you can start a blog about something you have no idea of, it’s not recommended. This is because it takes hundreds of blog posts to succeed.
If you just heard of something, you probably don’t have the energy to write about it for the next couple of years every day.
#3 Be Careful with Expertise
Try to find a niche where you can add value easily.
Not every tech sub-niche requires a decade of expertise.
For example, anyone can review software or hardware with minimal experience.
Or even as a beginner, you might be able to put together high-quality coding articles. This is because you can relate to other beginners.
But then, a niche like quantum computing is a lot tougher without experience.

First, you should have a solid understanding of quantum mechanics.
Besides, you should nail computer science and quantum technology.
#4 The Allure of Product-Based Niches
One cool way to find a niche is by considering products you’ve come across.
Those can act as keys to finding niches you might not have thought of.
For example, think about a tool like Grammarly. It’s an AI spell-checker tool.
By knowing such a tool exists, you can check if it has an affiliate program.
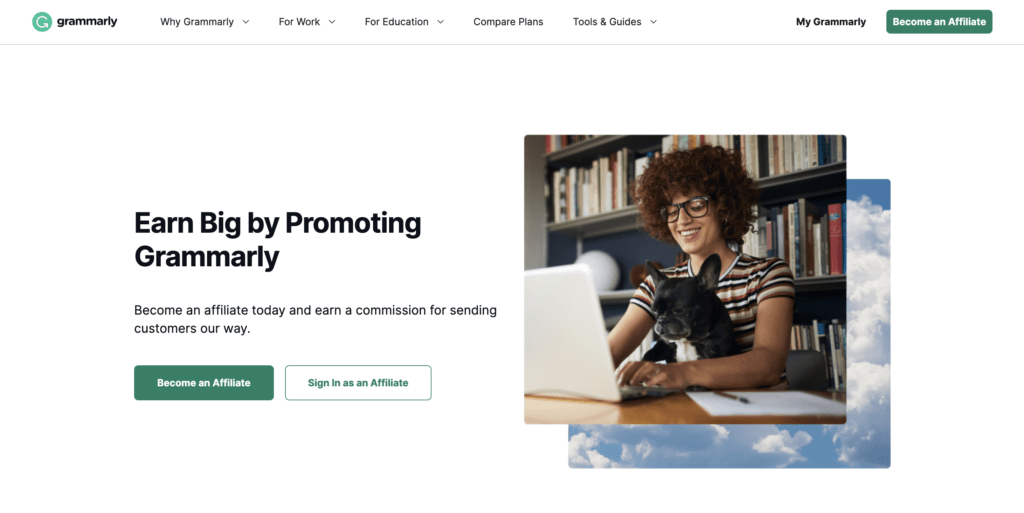
And surely, it does.
So by promoting Grammarly, you could make a nice income if you get people to sign up.
But even more importantly, this suggests there probably are other players in the AI-writing space.
That’s indeed the case.
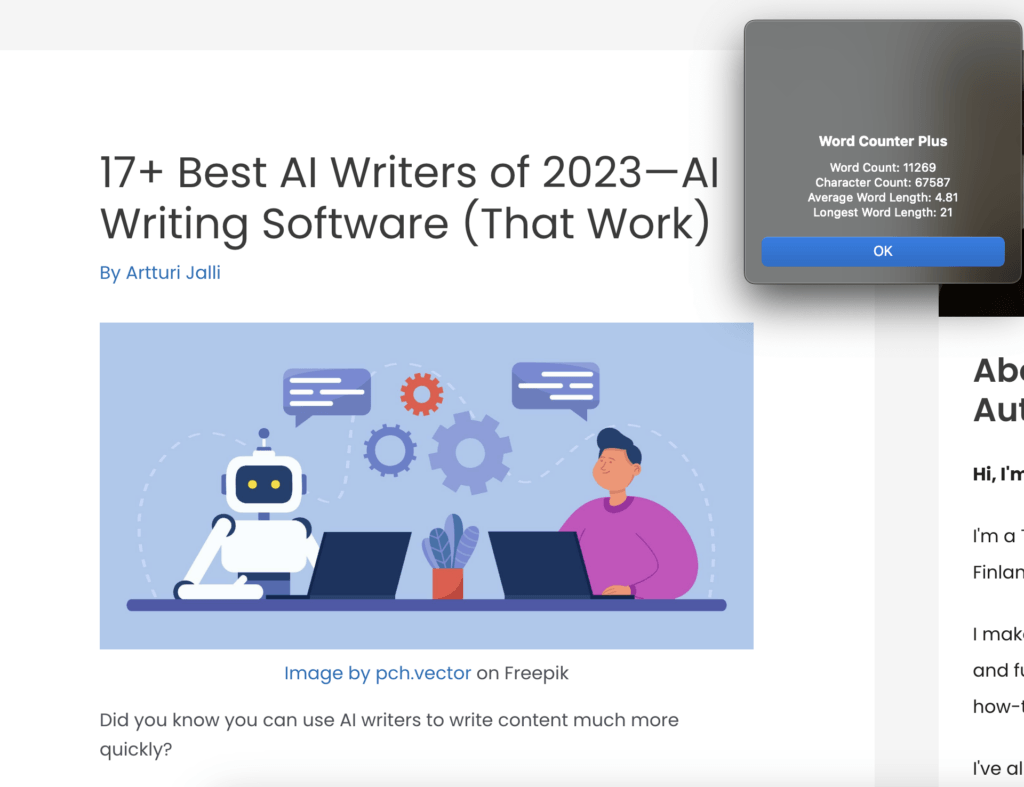
By looking at blog posts that review AI-writing tools, you can see that they all have affiliate links.
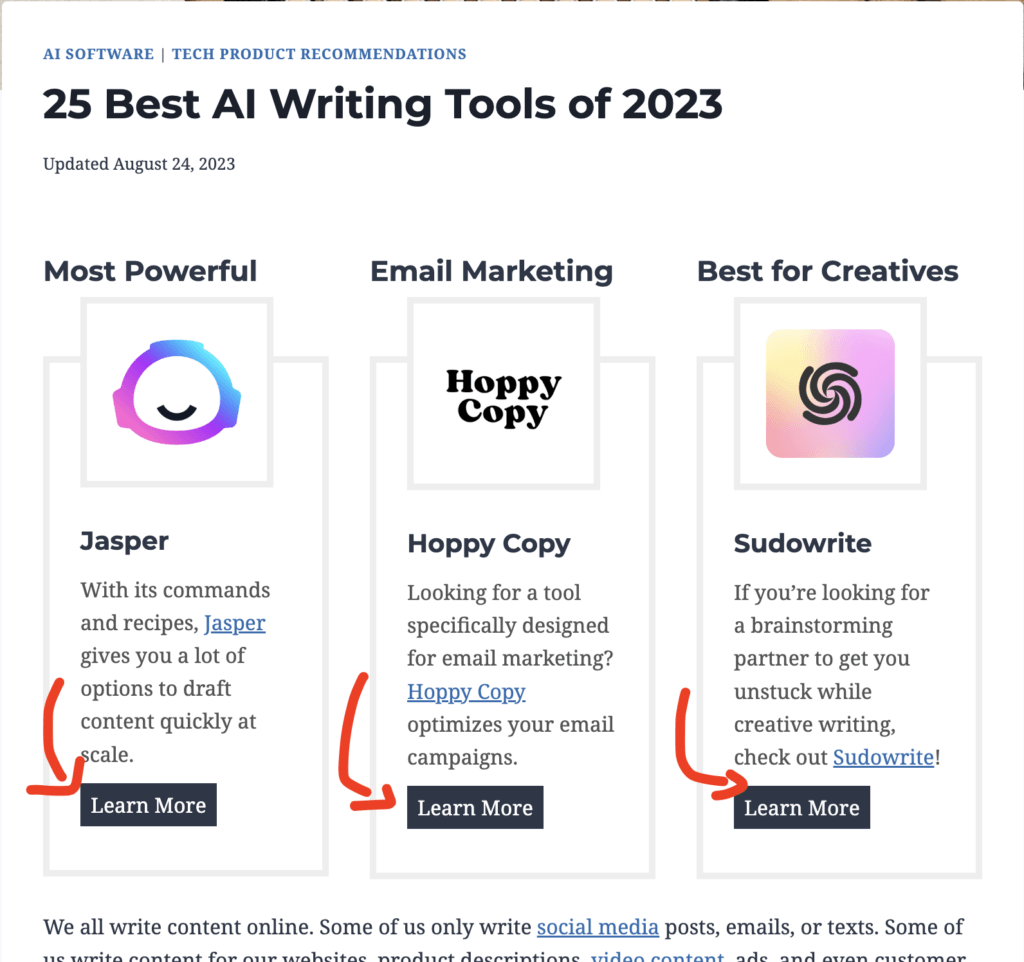
This suggests that AI-writing and AI-powered tools are probably a lucrative niche you might consider.
Anyways, the most profitable niches are those where people are looking to make purchases.
If there are affiliate programs in your tech sub-niche, that’s a good sign!
#5 Insights from Websites for Sale
A good way to learn whether a niche is worth considering or not is by learning what the sites earn.
However, the issue is that blogs typically won’t share their income sheets.
But there’s a clever trick you can do.
Try to look for blogs for sale in your sub-niche on sites like flippa.com.
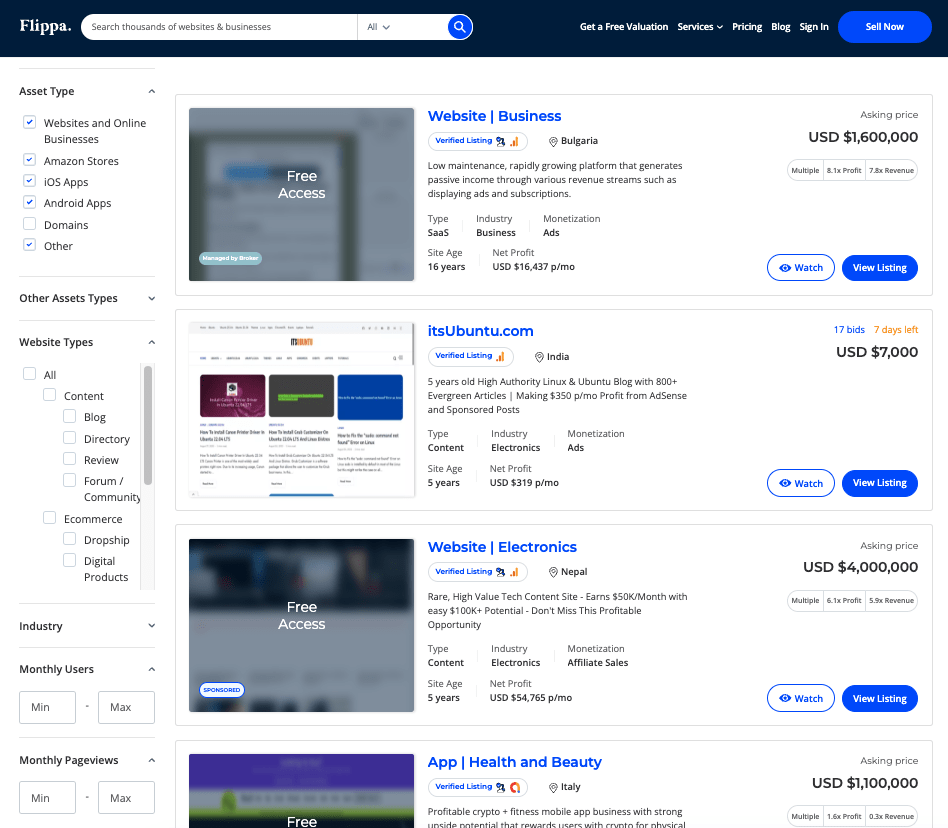
These sites list the income of those blogs because that’s relevant information for the potential buyers.
From there, you can see what types of numbers your niche’s blogs are doing.
2) Niche Validation
Validating your niche is key to ensuring its longevity and profitability.
In this step, you’ll make sure you don’t target a niche that’s too competitive or where you have no chance of getting traffic.
Basically, there are four things you want to do:
- Ensure search volume
- Make sure there’s not too much competition
- Ensure there’s money to be made
- Check that your niche is not too YMYL
#1 Search Volume Validation
Before you start a blog, it’s crucial to make sure there are enough people searching for your topics.
You don’t want to end up with a blog whose maximum monthly traffic is in the tens of thousands.
To ensure search volume, identify some key sites in your niche.
Then open up a free tool called SimilarWeb. Then search for that site in SimilarWeb.
This will give you an estimation of the traffic of the website. (The actual search volumes of a website are not known by any other people than the website owners.)
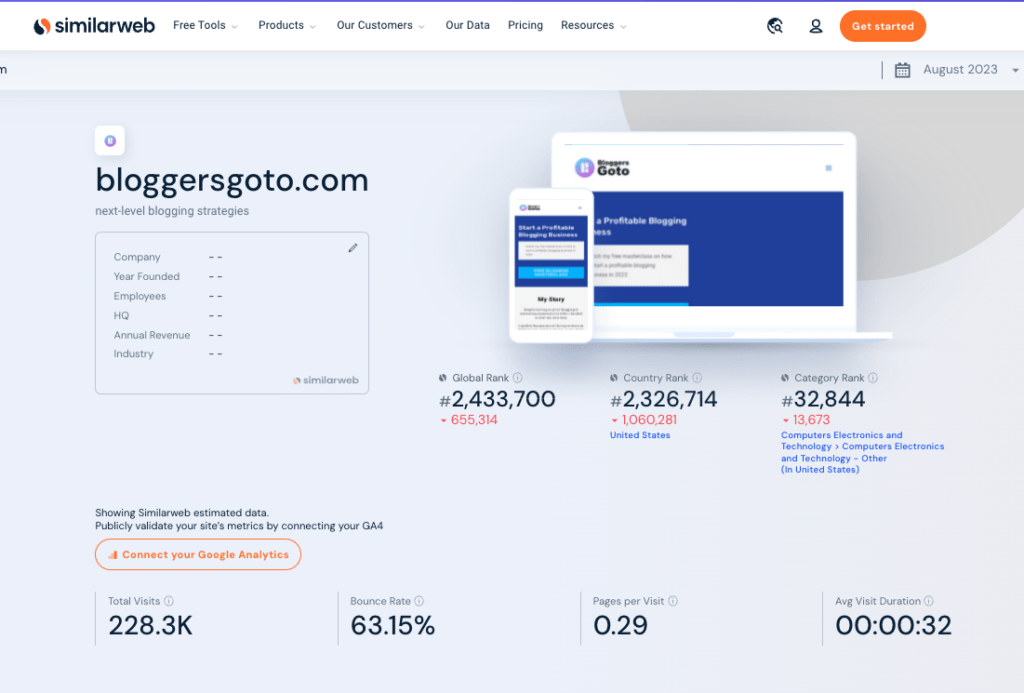
These numbers are usually way off.
But you can still check if a site has a significant amount of traffic or not.
If this tool shows any number above 5,000 monthly visitors, that suggests that the site has a ton of traffic.
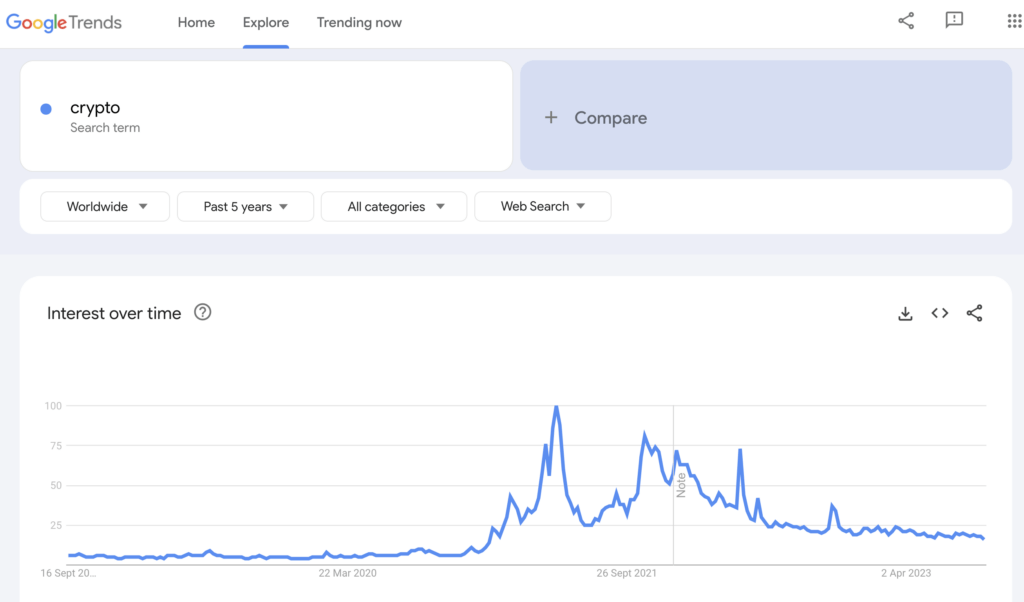
Another thing you can do is search for your niche in Google Trends.

This, once again, doesn’t show actual search volumes. Instead, it shows you trends related to that search.
If your niche (or some key search phrase in your niche) has a continuous graph like above, that suggests there are tons of searches.
But if the graph looks very discontinuous or if there’s no data at all, that might mean there’s very little search volume.
Just use common sense with this one! The longer the search phrase, the less volume it has. So if you use Trends, just search for something very integral to your niche, or the niche name itself.
So search for something like “AI Writing” or “AI writers”, not something like “Best Jasper AI alternatives of 2023”.
#2 Profitability Validation
Affiliate Marketing Opportunities
Affiliate marketing is one of the key blog monetization strategies on the market.
If a niche has no affiliate programs, it’s probably hard to monetize.
To ensure the profitability of your niche, look for affiliate programs in your space.
Just use Google.
So for example, if your potential niche is “AI Writing”, search for “AI Writing affiliate programs” on Google.
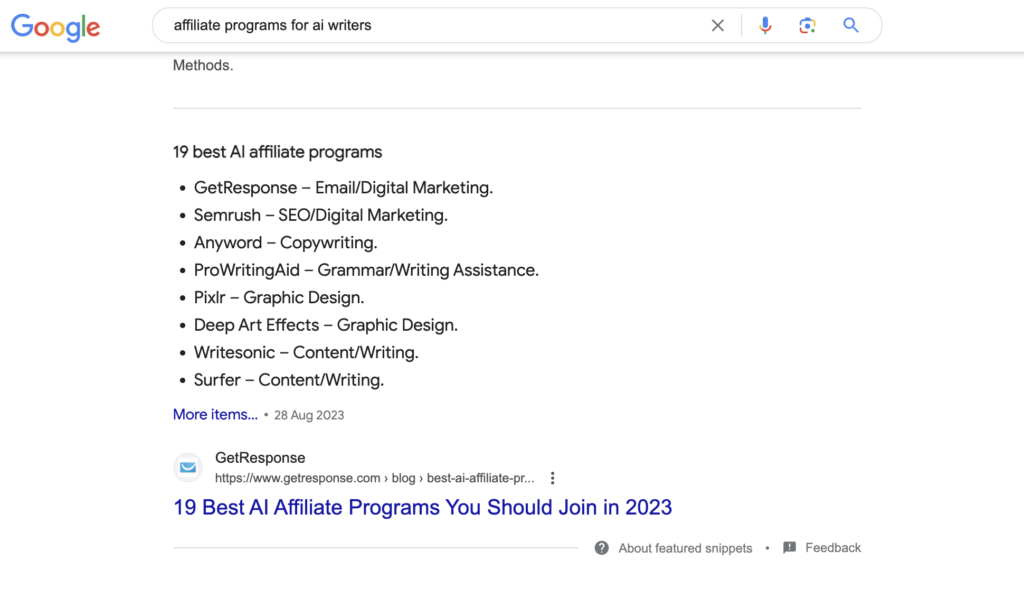
If there are affiliate products, then there’s probably a ton of money to be made in your niche.
If you cannot find affiliate programs or if you just find one or two, that’s usually a sign of a less monetizable niche.
#3 Competition Check
To start a successful blog, your blogging niche should not be too competitive.
To check if there’s too much competition, there are a couple of things you can do.
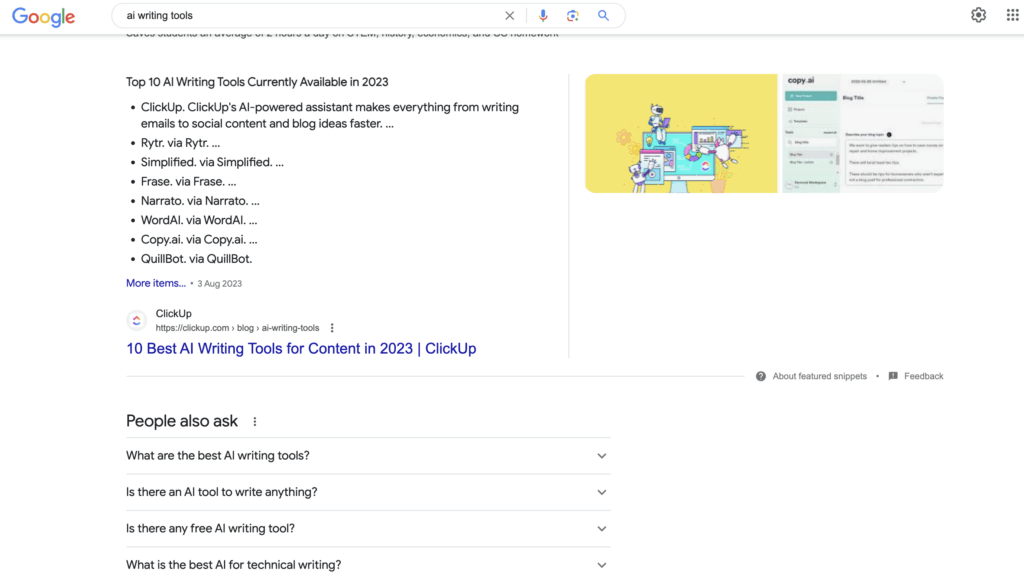
First, identify commercial searches in your niche. (These are the money-maker blog post topics you might write about in the future.)
For example: “Best AI writers of 2023” or “Best VPNs”.
Then, simplify those search phrases by filtering out extra words and particles like “a”, “an”, “the”, “of”, “in”, and so on.
For example: “best AI writers”.
Then, open up Google and search for “allintitle:[your search phrase here]“.
For example: “allintitle:best ai writers“.
This shows you how many competing pages there are for your topic.

If this number is in the thousands, there’s usually too much competition for that topic.
Of course, you need to find a bunch of topics before drawing any conclusions.
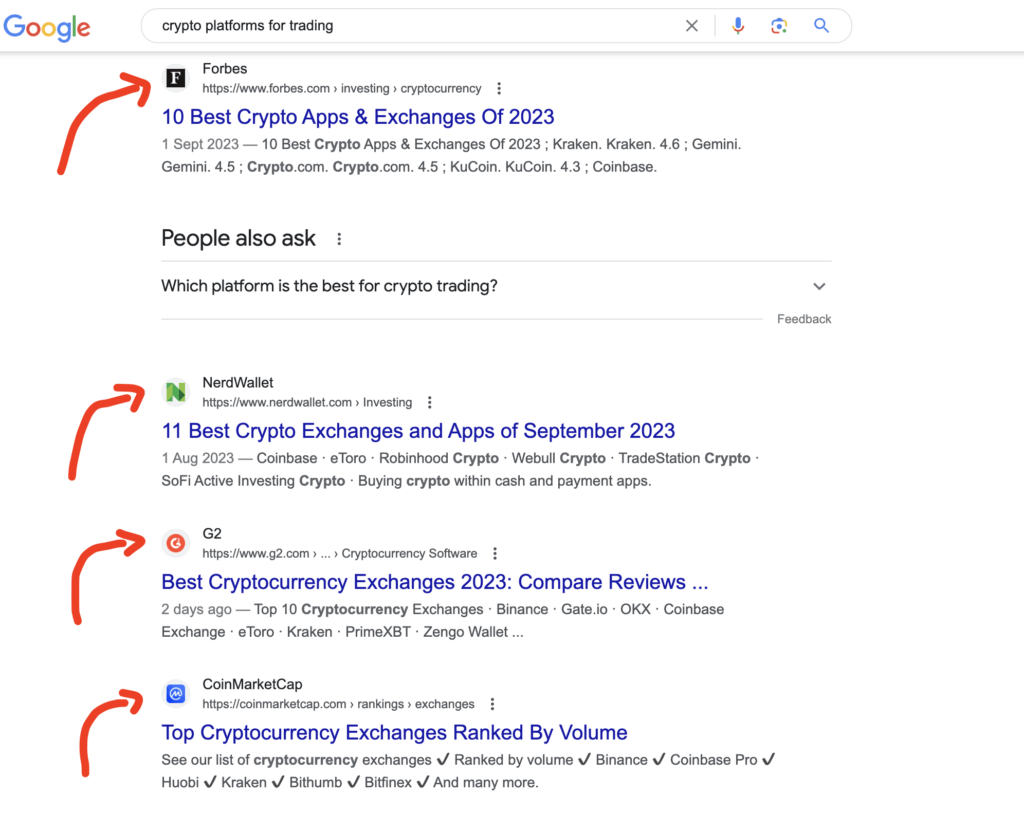
But if you consider something like Crypto, if you search for “Best crypto platforms”, you’ll find tens of thousands of results.
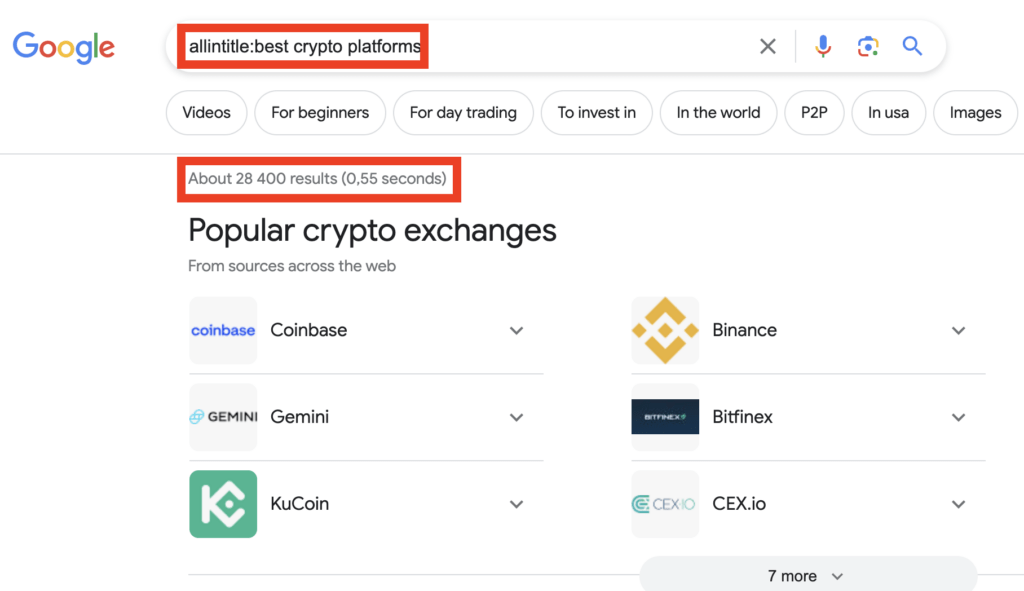
This means there are tens of thousands of competing pages. The competition is thus fierce, and it might be impossible to get traffic.
However, if your niche’s commercial searches have (very roughly) 100-1,000 competing pages, there might be a chance for you to rank high.
The next thing you can do is try to see if there are other one-person blogs ranking high.
If there are just those big commercial sites at the top of the search results, there might not be a place for your site.
But if there are smaller blogs or some Quora/Reddit answers at the top of the search results, that’s always a good sign.
For example, if you search for “should you write on Medium”, you can see my blog at the top.
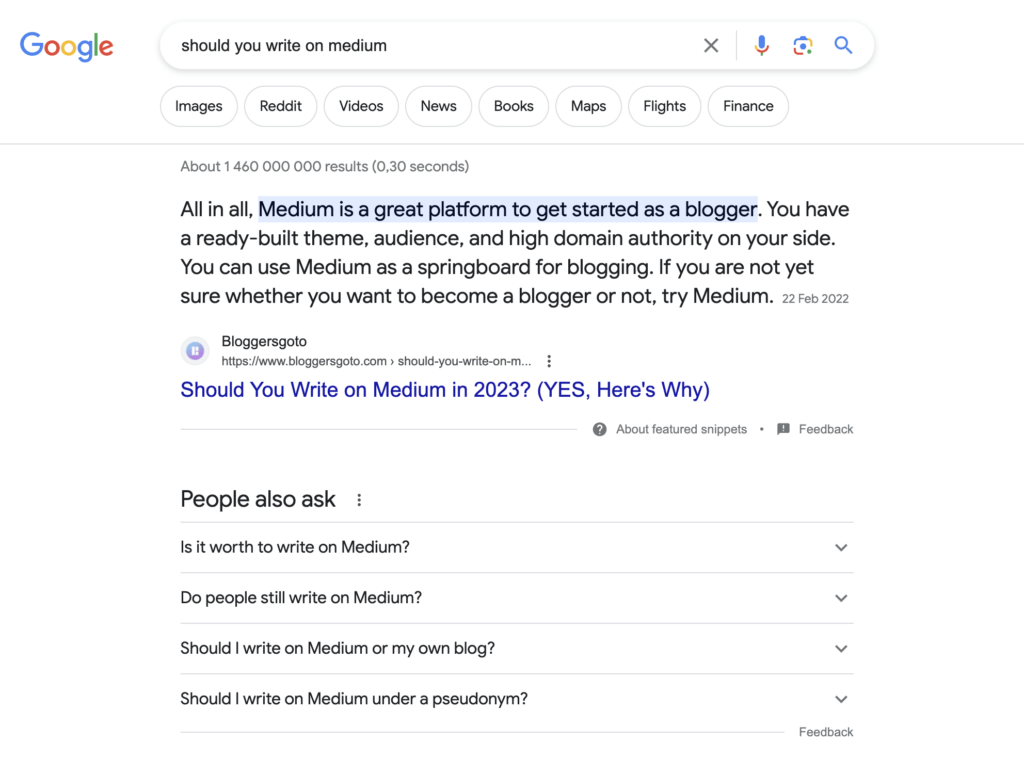
This immediately tells us that Medium writing is not that competitive niche. I have a small website with ~150 posts that ranks for it.
But if you only find those huge sites with thousands of blog posts, that’s always a sign of fierce competition.
#4 Avoid YMYL
Last but not least, make sure your niche is not “too YMYL”.
YMYL stands for Your Money/Your Life.
YMYL niche refers to topics that can directly impact a person’s happiness, health, safety, or financial stability.
Search engines, like Google, place high importance on the accuracy and authority of YMYL. Inaccurate or misleading information in these areas could harm readers.
This means it’s hard to rank high on the search results with YMYL topics—unless you have a very reputable site and actual expertise in the topic.
In the tech niche, YMYL sub-niches include:
- Online Banking and Financial Apps
- Digital Health and Wellness Apps
- Tech Investment Advice
- Cybersecurity
And more.
Avoid these niches unless you’re a professional in those.
That’s it for the niche! Now you should have a good idea of how to find and validate niches in the Tech space.
Remember to not get stuck here! There are always reasons and concerns in every single niche.
Just pick one that seems interesting, monetizable, and relatively low in competition.
You can always change your niche later, although, it requires significant efforts because you essentially have to start from scratch.
2. Get a Domain & Hosting Plan
The next step is to start building the tech blog.
Basically, you need a domain and a host. The domain name is basically just the name of your blog.
Come up with a short, memorable, and catchy domain name. While it can be related to your niche, it’s not a necessity.
For example, my latest blog is called logilax.com. It’s a tech blog but the name doesn’t tie me into anything specific.
If you’re out of ideas, you can always do firstnamelastname.com.
This offers the flexibility to change the blog’s niche because the name isn’t associated with any specific niche.
By the way, you can use free tools like Domain Wheel to come up with domain names that are available.
Remember to select a popular domain name extension like .com, .org, or .net.
Once you know the domain name, you need to acquire it.
To do this, you need to use a domain hosting service.
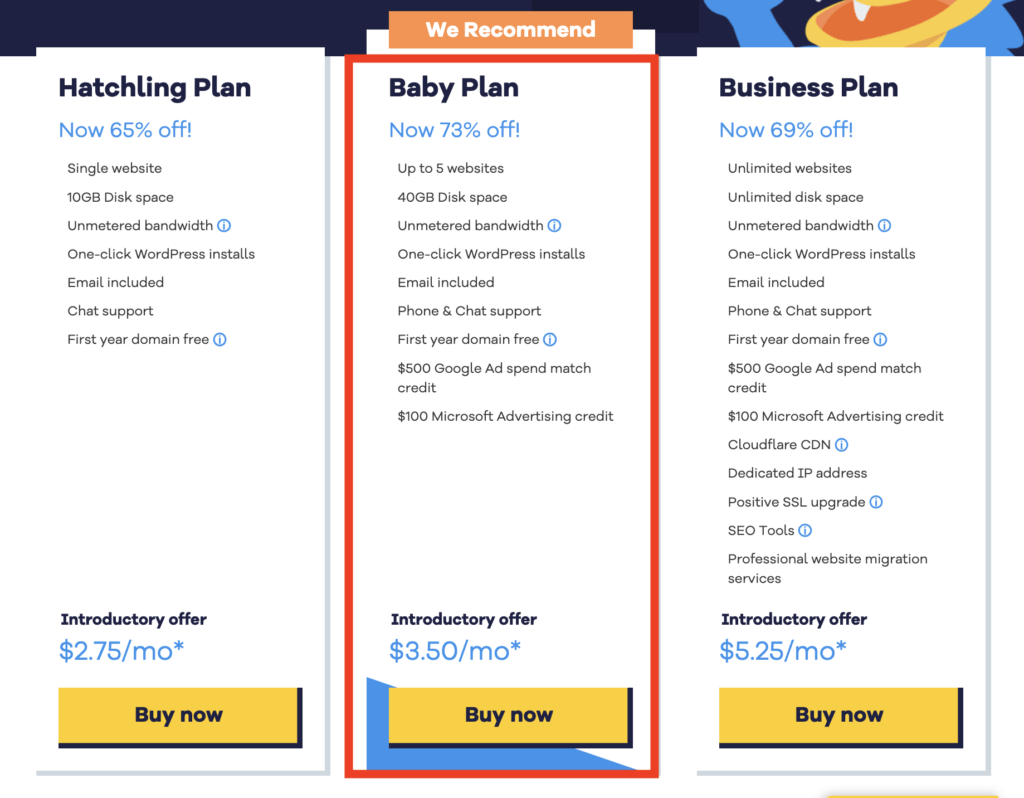
In this guide, we use HostGator and recommend starting with the suggested Baby Plan.
Next, fill in the basic information to get your domain:

During this process, you’ll also create a HostGator account that you need later on.
Once you’ve done this, you have successfully purchased a domain. Congrats!
But there’s still no website behind that domain. That’s exactly what we’re going to do in the next step.
3. Install WordPress
To build a website, you need a website builder.
We’re going to use WordPress—the best and most scalable way to build blogs and websites.
Yep, we’re not going to code the site from scratch! 🙂
The way this happens is that we request HostGator (our domain host) to install WordPress to the domain you just purchased.
Here’s a step-by-step guide for installing WordPress to your domain.
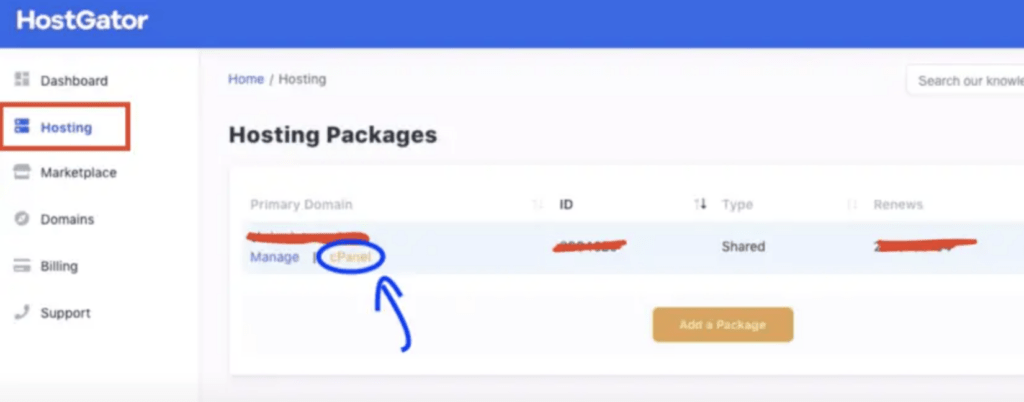
Navigate to your HostGator dashboard.
Click on the “Hosting” tab located on the left-hand side of the screen and then click the cPanel button.
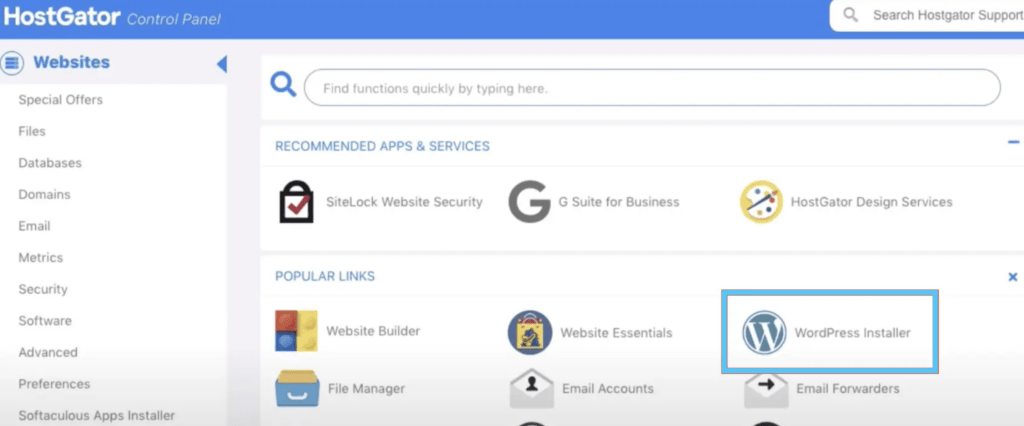
Then click “WordPress Installer“.
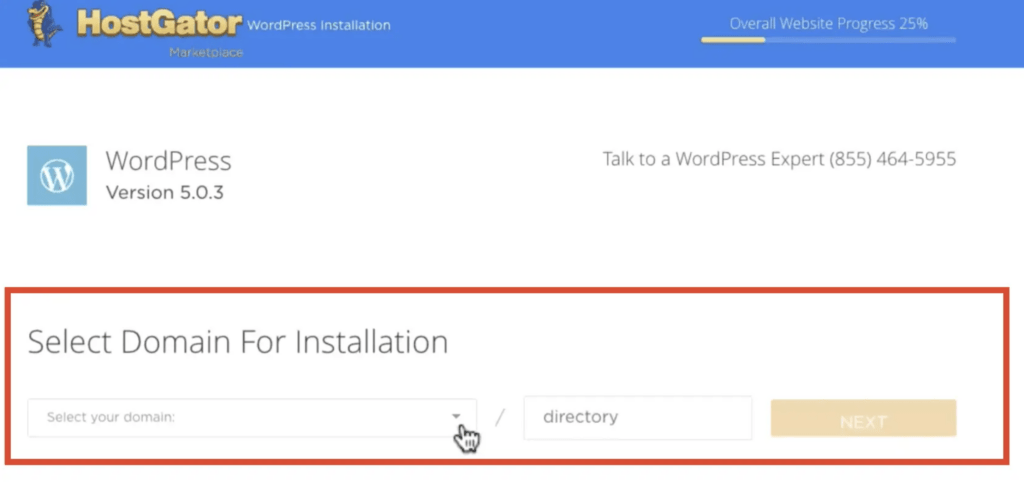
Choose the domain you purchased and click “Next“.
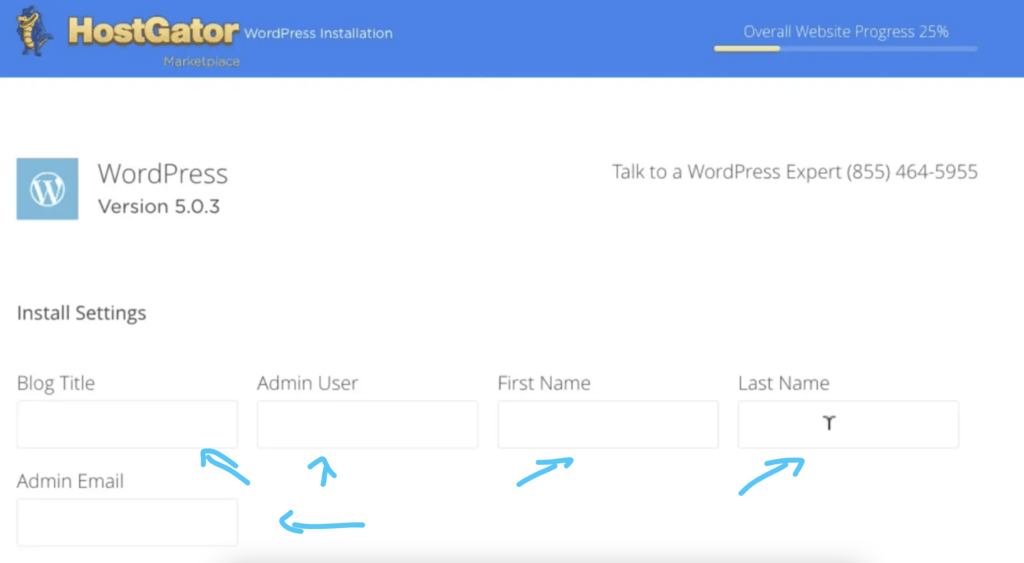
Fill in your blog information. (You can easily change these later on.)
Read and accept the terms of service.
Click on “Install” to install the WordPress website on your domain.
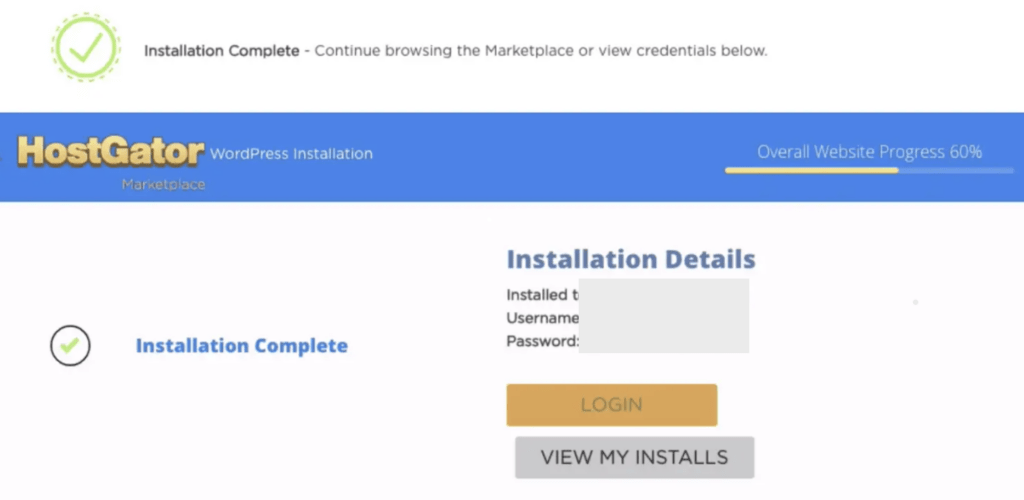
Once the installation finishes, you can log in to your blog’s admin view.
💡 Your login information will show up once the installation is completed. Copy the credentials and click on “LOGIN.”
This opens up the login view to your admin user on your brand-new blog.
Here’s what the login page looks like:
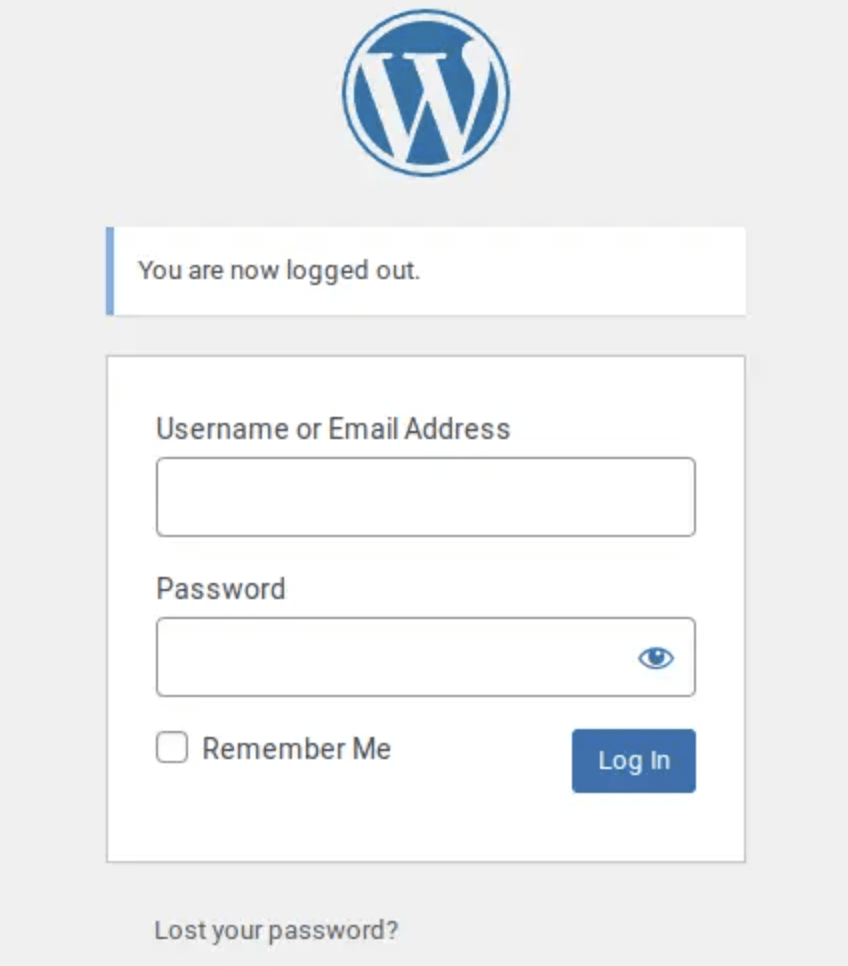
Enter the login credentials you just got and click “Log In.“
After logging in, you will see the WordPress admin console.
In this view, you can choose your website’s theme, change settings, and write blog posts.
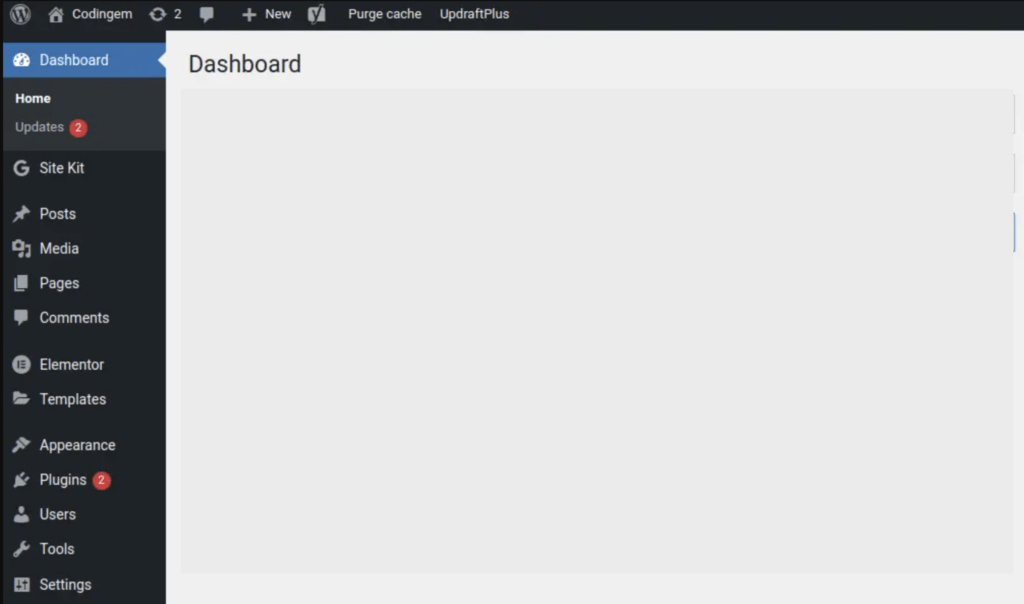
Amazing! Now you have a default website and a domain.
You probably want to see it live for the first time, right?
Just enter your domain name into the URL bar and hit enter.
You can also visit your blog from the admin dashboard:
- Hover your mouse over the top left corner where it shows your site’s name.
- Click on “Visit Site.“
Now, you can start writing blog posts for your site.
But most likely, your site doesn’t look the way you want it to.
We’re going to do customizations to the site next to make it look yours.
4. Select a Theme
💡 Tip: Don’t invest time or money in your blog’s design at first. The most basic design will do at this point!
When you make consistent income from your site, it’s time to revamp the design.
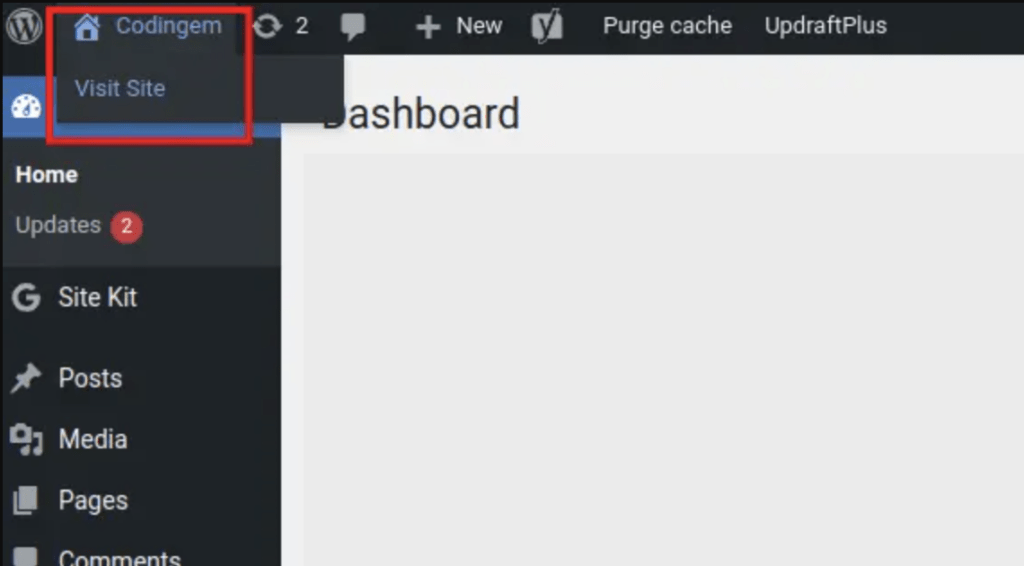
The simplest way to create a good-looking blog is by using a built-in WordPress theme.
To select a theme for your site, go to your WordPress dashboard (your-site.com/wp-admin/) and select “Appearance,” then “Themes,” and “Add New“.
Type something into the search bar to find themes.
Pick one of these themes, click on “Install” and “Activate“. This applies the new theme to your site. You can visit your site to see the changes.
💡 I recommend choosing a simple and minimal design. The most common themes are the Twenty-something themes. I sometimes use those. 🙂
Once you’ve chosen the theme, it’s time to do some further customization to the site.
- Visit your website.
- Click “Customize”.
- Hover over some user interface elements.
- See a blue edit icon appear.
- Click on the icon to make changes.

Change any text, images, or logos as you wish.
Just don’t get stuck. If you have no logo, that’s not going to be a problem for a long time.
Also, if you can only come up with generic taglines or site names, don’t worry. Just go with something and change it once you get a ton of visitors.
Anyways, most themes allow you to change the:
- Background image
- Basic naming and tagline settings
- Site logo
- Site icon
- Footer settings
How to exactly do this depends on your theme. There are some variations, but most work very similarly.
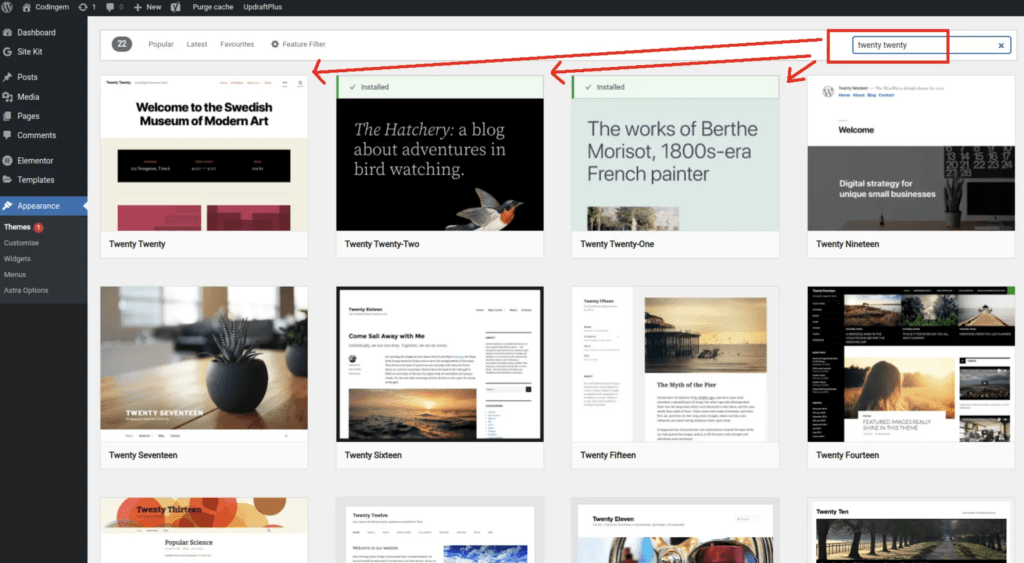
Anways, if you’ve clicked “Customize” on your blog’s homepage, you should see a left sidebar similar to what’s below:
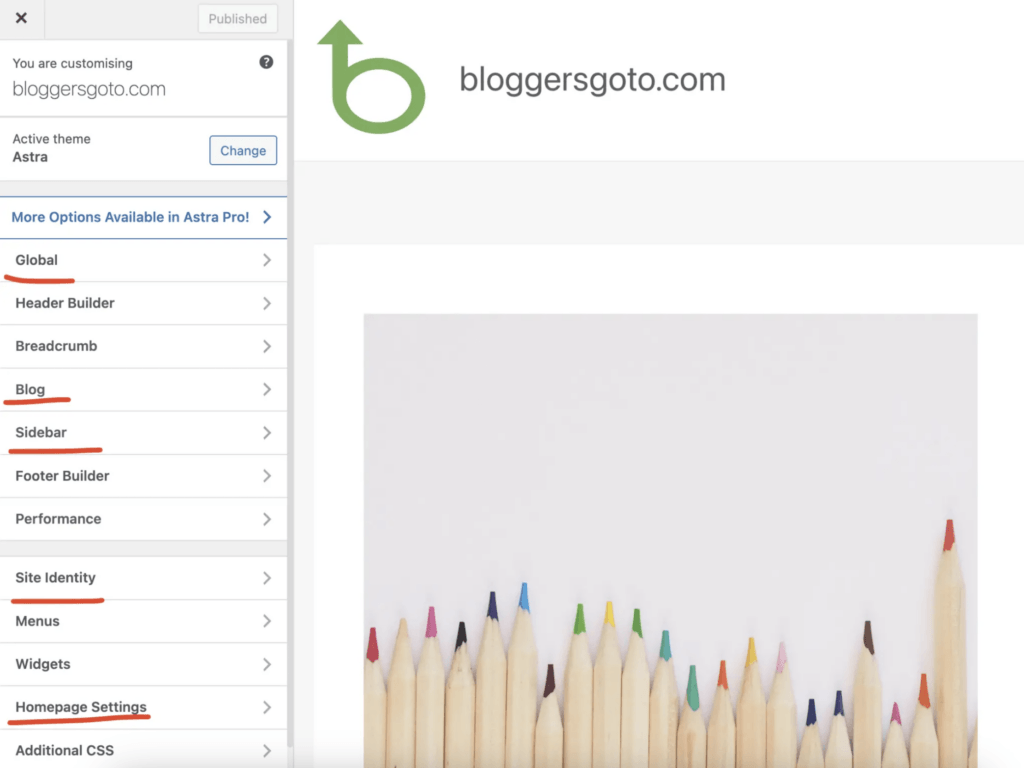
💡 Different themes have different options. There’s no generic guide that would show exactly what you can edit and how. Just mess around a bit and you’ll figure it out. 🙂
Don’t get stuck even if your site looks absolutely terrible.
It won’t impact your chances of getting visitors to your blog posts. Trust me!
5. Create the Important Pages
After customizing your site, let’s create the About, Contact, and Privacy Policy pages.
To create a new page:
- Open the WordPress dashboard.
- Click on Pages.
- Select “Add New.”
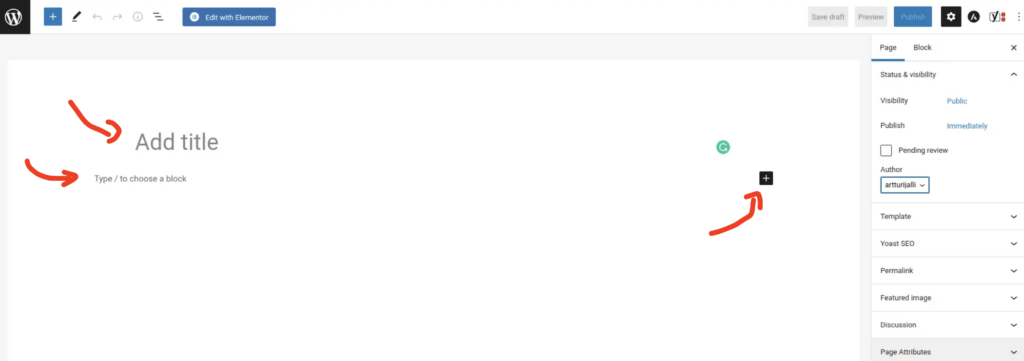
This opens up the editor of the new page.
To add some text content like headings, paragraphs, lists, or images, click on “Type / to choose a block”.
To go live, just hit “Publish” in the top right corner. This publishes your page to your website.
Let’s take a closer look at what to include in your About, Contact, and Privacy Policy pages.
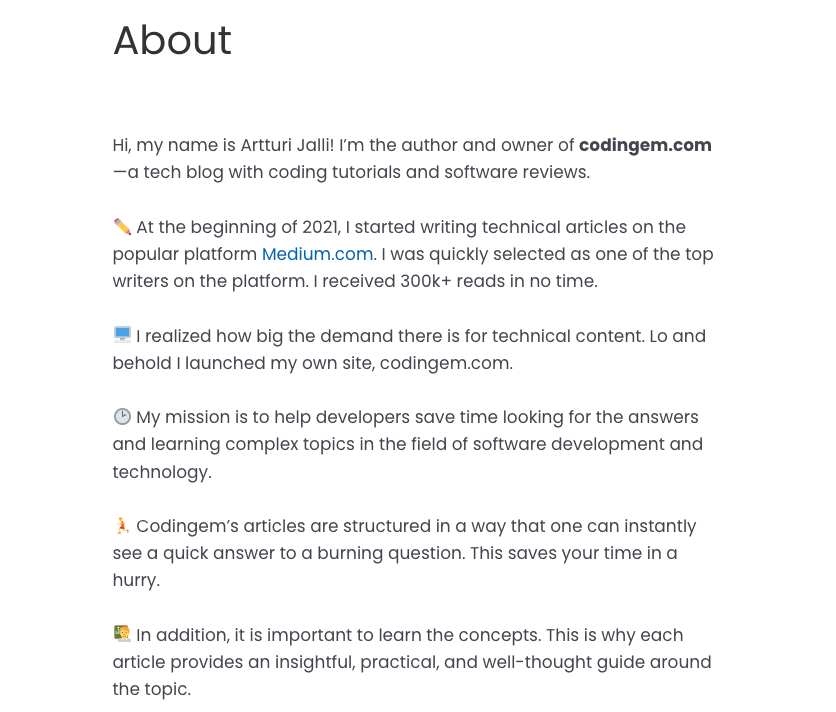
Page 1. About
The About page is an important component of your website.
Although nobody will read it in the next 6 months, it’s still good to have one to make it look professional.
Consider adding the following to your About page:
- Who you are. Add background information about yourself, such as your name, occupation, and interests.
- What is your mission? Let the reader know why your blog exists and why they should care.
- How readers can relate to you. Share experiences that your readers might be able to connect to.
- Why readers should read your blog posts. What makes your blog unique? What can your readers expect to gain from your content?
Here’s an example About page that I’ve used in the past.
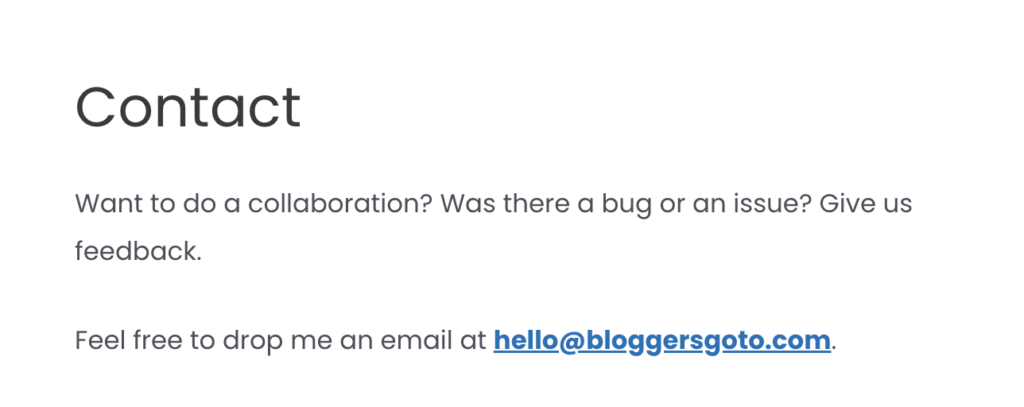
Page 2. Contact
The contact page is simple. It should be something that instantly tells how to contact you.
Just add an email and you’re good to go!
Page 3. Privacy Policy
Creating legal pages for your blog is an important step. It is important to have a Privacy Policy page to inform your visitors about how their data is being collected and used on your site.
To create a Privacy Policy page, you can use a tool that generates a custom policy based on your site’s needs.
Remember to review and update your policy as needed.
Even if you track the number of visitors to your site, you need to disclose that on your Privacy Page.
How to Add the Pages to Navigation?
After creating the pages, you want to show them on your blog.
Include the About and Contact pages in the main navigation menu of your site.
To do this, go to the Appearance > Menus section in your WP dashboard.
Select the pages you want to add to your menu and drag them to the desired position in the menu hierarchy tab.
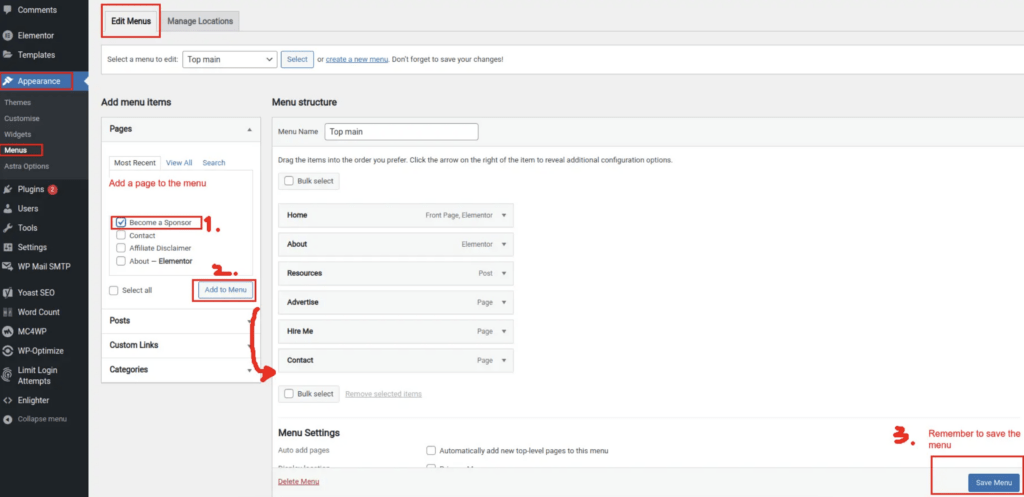
Make sure to save your changes.
Also, preview your site to ensure that the new menu items are visible and clickable.
Add the Privacy Policy to your footer menu instead of the main menu.
To make edits to the footer menu, navigate to Appearance > Menus and select the footer menu instead of the top main menu.

If there’s no footer menu, you might need to add a new one.
6. Basic Blog Configurations
To ensure that your blog post URLs are simple, let’s change the permalink structure of your website.
You should only do this before you start writing blog posts.
If you’ve already published posts, changing the link structure means you delete your all posts.
To change the permalink structure, navigate to your WP dashboard and click Settings > Permalinks.
I recommend choosing the “Post name” option. This is handy because the shorter and cleaner the URL, the better.
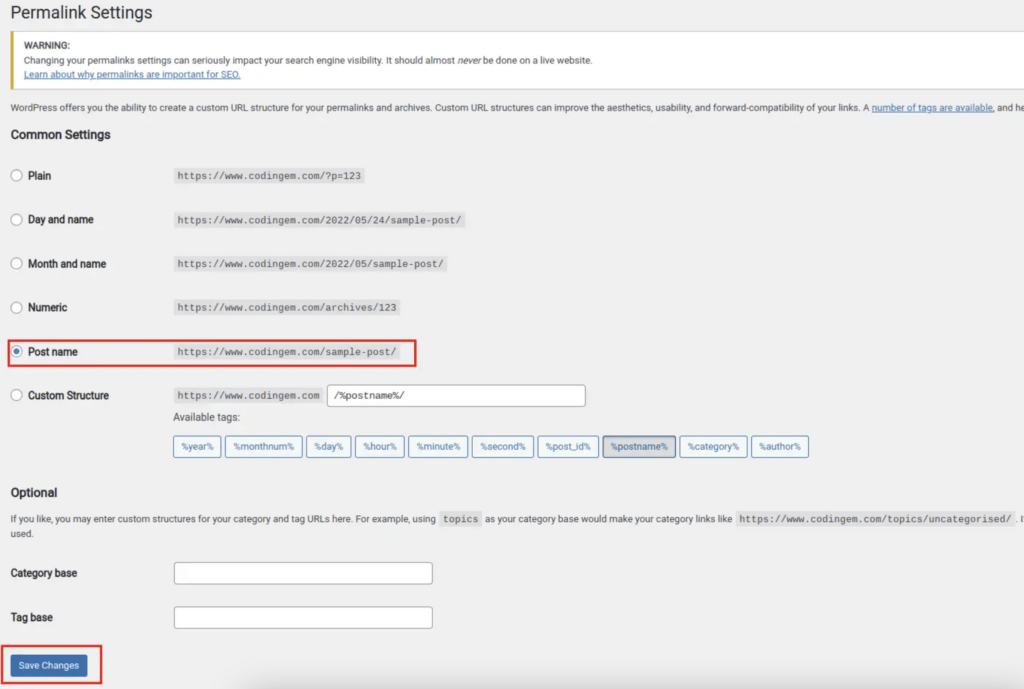
Click the “Save Changes” to complete the change.
At this point, you’ve successfully created a blog. Congratulations!
But here’s where the journey begins. To get visitors, you need to write hundreds of high-quality posts to your site.
Let me show you how to do that!
7. Start Writing Blog Posts
Writing quality content is essential to get blog visitors.
But you cannot just go ahead and write a post.
You need to be very strategic when choosing topics and writing and structuring your posts.
Before writing, though, you need to learn how to write and publish a post in WordPress. We’ll talk about the strategies after this one.
How to Write a Blog Post on WordPress?
To create a blog post in WordPress, go to your WordPress dashboard and click on Posts > Add New.
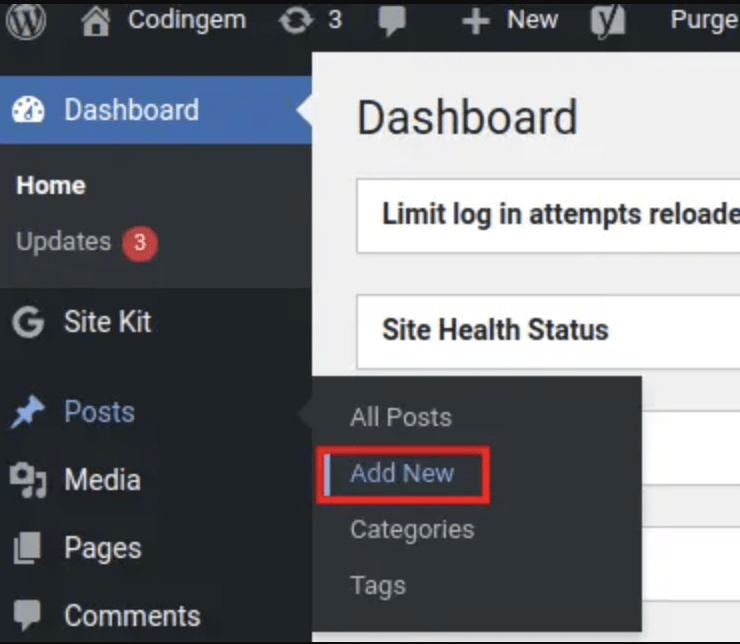
This opens up the blog post editor’s view. This is where you will write, edit, and publish your new blog posts.
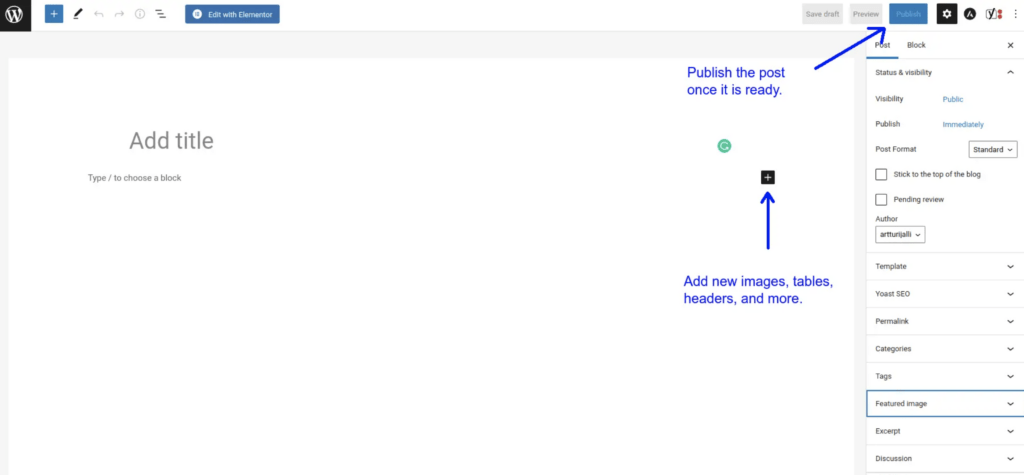
The controls are intuitive and easy to use (and work the same way as the page editor you already used).
By clicking the + icon, you can add different types of elements to the post. These could be headings, images, tables, and whatnot.
When you’re done writing, hit “Publish”.
Most WordPress themes show recent posts on the home page automatically.
Visit your site to make sure that your new post is there.
How to Write Blog Posts That Rank?
From now on, all you need to do is write and publish blog posts. Nothing else matters for the next months to come.
But blogging has changed. It’s not about writing what pops up in your mind.
Instead, you need to write about topics that people are looking for answers for in your niche.
This is because you want your blogs to rank high on Google to get visitors.
But it’s not enough to just choose an in-demand topic. Every post you write needs to provide actual value.
Basically, every post is like a micro business.
It needs to be the best post about that topic on the entire internet. Otherwise, Google has no reason to show it in the search results.
You cannot just repeat or rephrase what others have told you.
For example, a post written with ChatGPT will never rank high. It doesn’t add anything new to the internet. It just repeats/rephrases existing content.
Instead, you need to add something unique to the table with every post.
You should become an expert in your niche while you grow your blog. This not only makes your content actually stand out but also easier to produce.
For example, if I wanted to write a blog post about Investing in Crypto (I’m not well-versed in that), I’d have to spend days doing research and even interviewing experts to put together a good post.
And I’d have to repeat that hundreds of times to get any traffic.
But if I had the experience, I could spit out information off the top of my head in minutes.
1. Finding Blog Post Topics
To write a successful blog post, you need to solve the reader’s problem.
To do this, you need to know what people are typing into Google.
Luckily, this is easy. Just use Google Search autocompletion. These are topics people commonly search for.
To use it, open up an incognito mode where the history doesn’t affect your searches. Then, start typing something related to your niche, and see the suggested results.

These suggestions are what people search for in your sub-niche.
In other words, these are good blog post topic candidates.
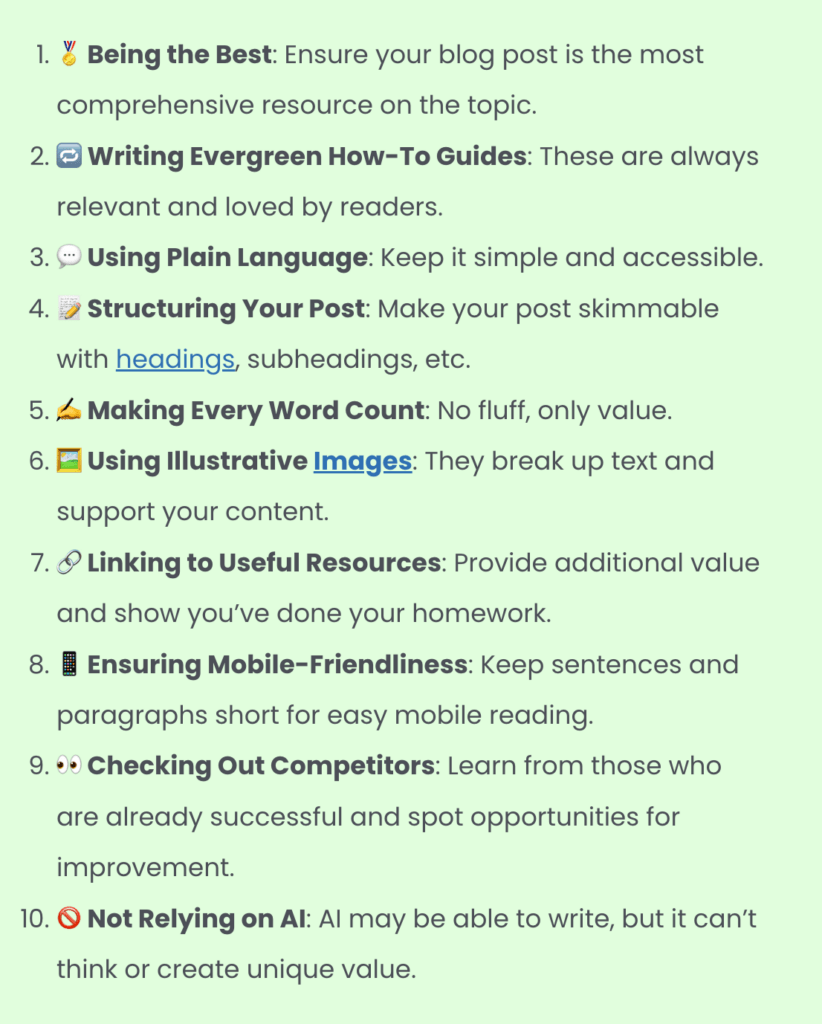
2. Solve Problems Better Than Others
To rank your blog posts high, you need to write posts that are more comprehensive and in-depth than any one of the top-ranking pages.
Always be the best!
When you find a blog post topic, search for it on Google.
Open up pages in the top 10 and see what they’ve done to get there.

You can use these as your blueprint for your post.
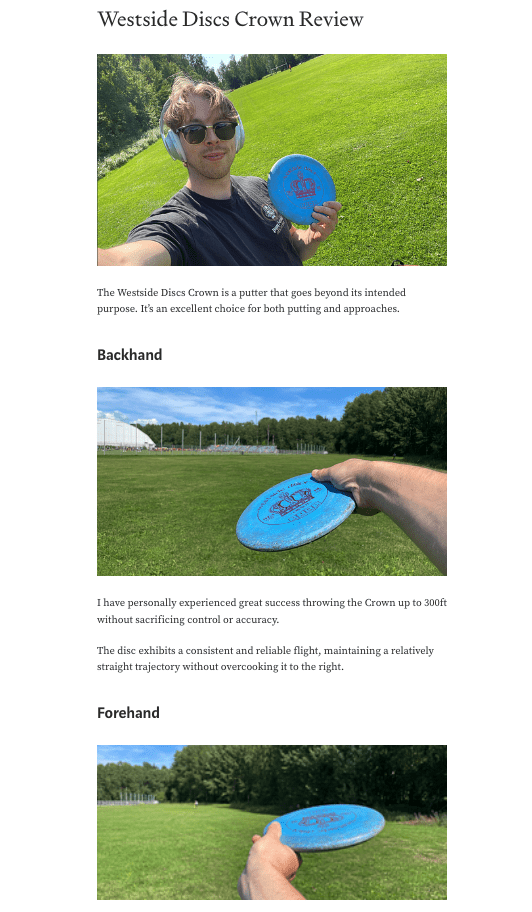
If every post starts with an image gallery, yours should start with one as well.
If every post is super long, yours should be even longer (and more informative).
The idea is to stand out. Otherwise, Google won’t recognize your work.
Say you’re reviewing software. If your competitors have 5-15 products in their posts, you should review at least 25.
3. Use Simple and Plain Language
A high-quality post doesn’t mean a post that uses difficult and cryptic language.
It’s actually the opposite.
Don’t use hard vocabulary or technical terms. Focus on clear language that is easy to read and digest.
This makes it easier for you as well as your readers.
4. Use Short Paragraphs
People read blogs on mobile devices.
Your posts should look nice on mobile.
To achieve this, break up long paragraphs and use short chapters and sentences.
Avoid creating a “wall of text” effect that covers the entire screen. Keep your chapters concise, with 2-3 sentences at most.
5. Use Illustrative Images
Use images. Those will break up the text nicely.
Add as many images as you’d like—at least one image per 100 words.
But don’t just add images just for the sake of adding images. Only use images that help deliver your message.
These can be images or screenshots you’ve taken yourself.
Avoid generic images from free image libraries!
4 Reasons to Avoid Stock Images in Blog Posts
6. Link to Your Other Posts
By adding useful links you can suggest visitors relevant articles on your blog, making them stay longer on your site.
The more technical reason is that Google appreciates sites that are strongly interlinked together.
Also, Google discovers new posts through links. If you have no links to your posts, Google simply might not find those.
But only place links where they naturally fit. It’s okay to have articles without links if they don’t belong there.
Always think about your users, not Google ranking algorithms.
7. Back Up Facts
Writing a blog post is not like writing a scientific paper. You don’t need to have a long list of resources at the end of the post.
Just don’t forget to add useful links to back up your facts.
Only link to reputable, truly useful sources.
Avoid linking to low-quality or spammy websites, as this can harm the credibility of your own site.
Now you know the basics of writing a high-quality blog post.
I know, it’s a lot of hard work, but that’s what it takes.
How to Promote a Blog?
You might be surprised, but it’s not that useful to promote your blogs.
If you share your tech posts with your Instagram followers, nobody cares.
If you share your posts on online forums, you’re only going to get banned.
Your content will not rank on Google any faster whether you do or do not promote it.
Just focus on writing high-quality posts and that’s it.
How to Monetize a Blog?
Blog monetization is one of the ultimate goals of every blogger.
You can use ads, write affiliate posts, and even sell your own info products.
But that’s not something you should do just yet.
Other than making sure your sub-niche is monetizable in the first place, don’t worry about monetization until you reach at least 10,000 monthly visitors.
When you get there, there are lots of opportunities. Let’s go look!
1. Ads
One of the easiest ways to monetize a blog is by displaying ads.
Typically, potential earnings from ads are around $0.01-$0.02 per visitor.
For instance, a blog with 100,000 monthly visits can earn around $500-$1,000 from ads.
The earnings depend on the ad network, blog content quality, number of ads, traffic source, content length, and more.
In most tech sub-niches, ads earn decently.
But ads shouldn’t be the only monetization strategy—unless you want to leave a ton of money on the table.
2. Affiliate Marketing
A key tech blog monetization strategy is affiliate marketing.
This happens by placing affiliate links on affiliate posts.
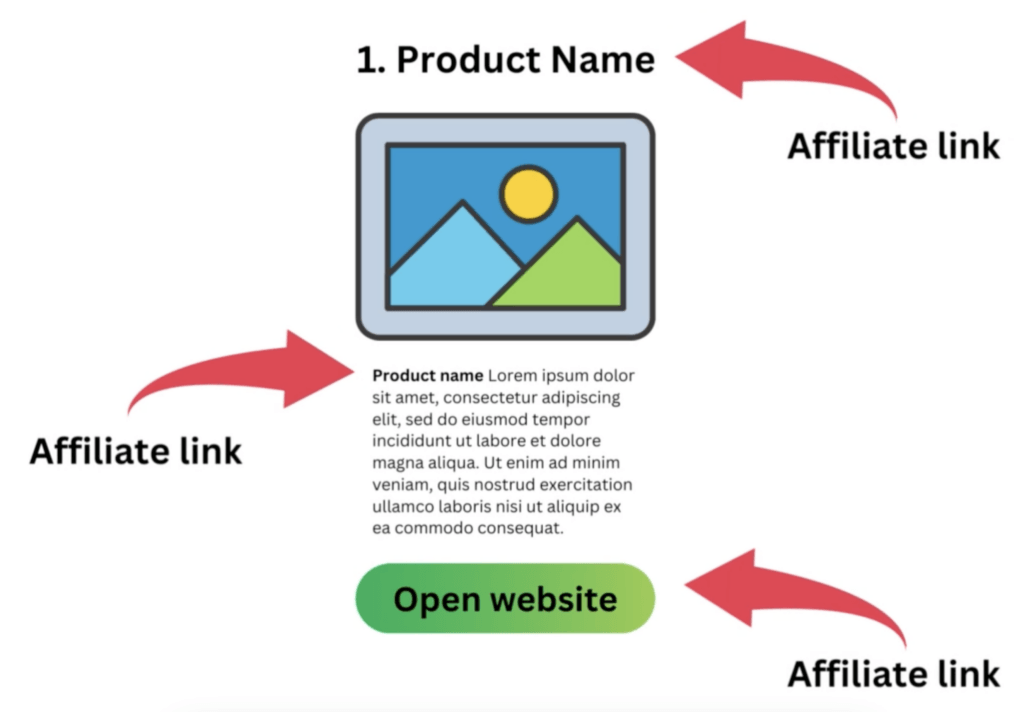
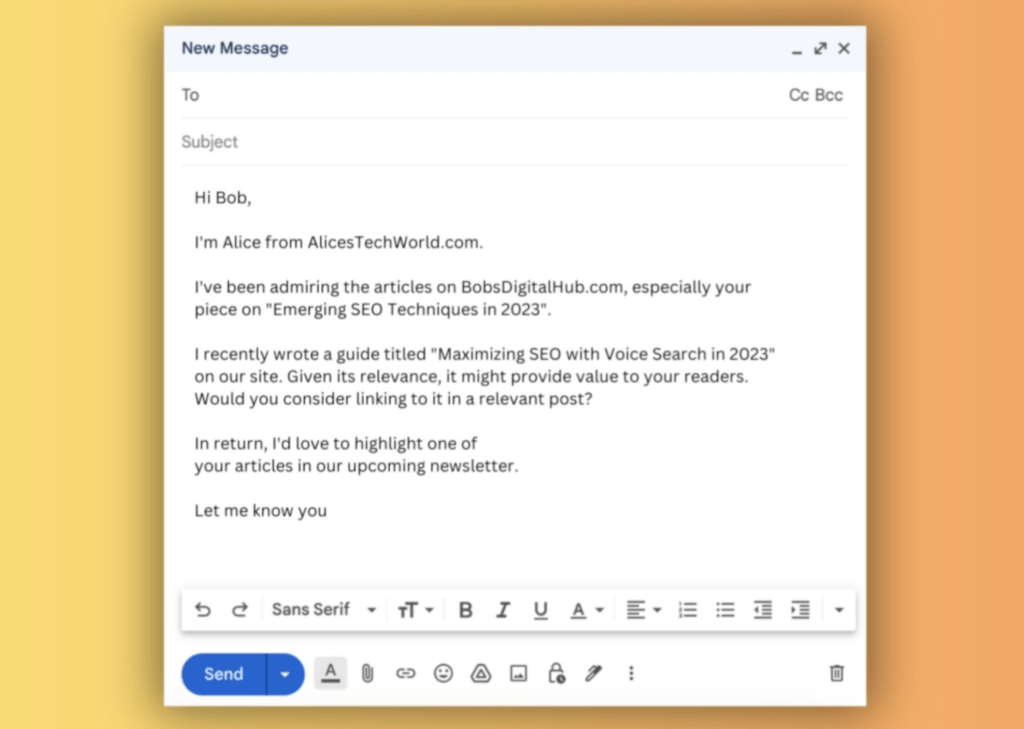
Here’s an example of me doing affiliate marketing in one of my affiliate posts.
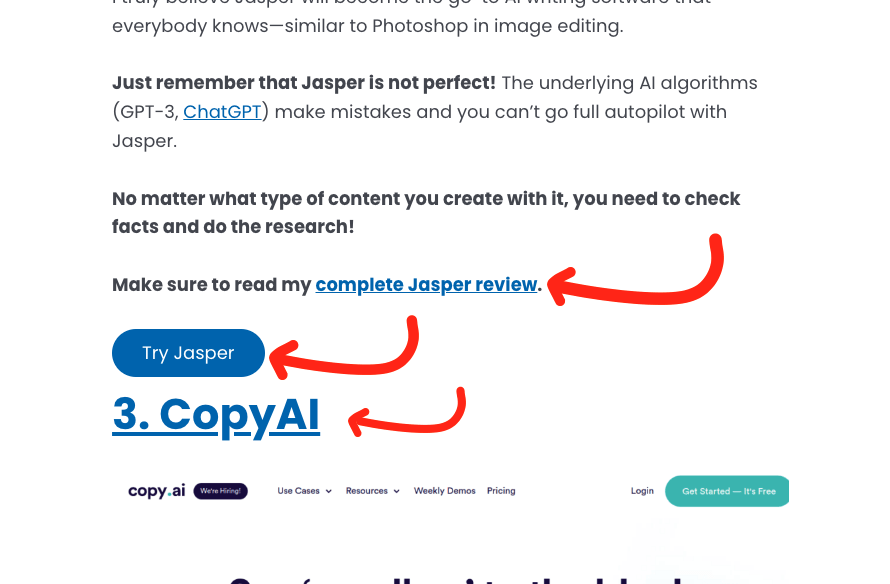
The idea of affiliate marketing is that if someone makes a purchase after using your link, you will earn a commission.
In the tech space, many affiliate programs pay well.
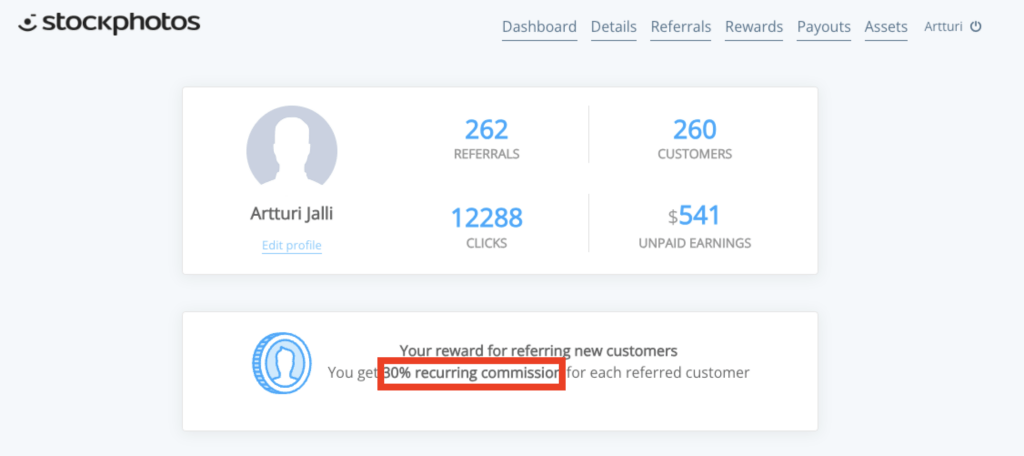
In the software sub-niche, you can find recurring affiliate programs. In these, you can earn a monthly commission from a customer as long as they stay subscribed.
So one long-lasting customer can bring in tens of dollars every month for years to come.
But keep in mind that affiliate marketing takes time. Adding links to non-affiliate posts makes no sense.
Instead, the links should only be in review/roundup posts, such as “Best AI Tools for Students”.
By the way, if you do affiliate marketing, remember to always disclose your affiliate links!
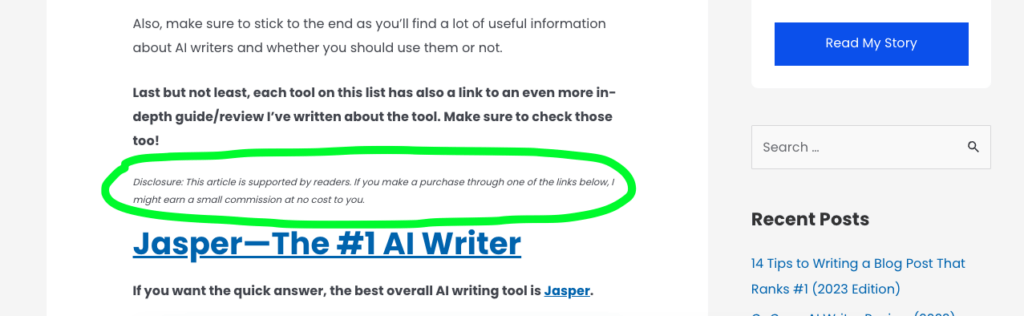
I’ve written a more thorough guide on how to do affiliate marketing.
3. Freelance Gigs and Consulting
As your blog gets more visitors, you can promote your own skills and services.
If you like, you can offer your services as a consultant or freelancer.
After receiving traffic on my coding blog, many recruiters approached me offering a software developer position.
Also, some marketing people sought my expertise to write tech-related articles for their websites.
While promoting your own services is cool, it’s not scalable.
At first, though, it can be your main money maker.
But as time goes on and your site grows, you should focus more on strategies that are scalable.
One example is doing affiliate marketing or perhaps even launching your own info product.
4. Sponsorships
One less common way to earn money with a blog is through paid collaborations.
Unfortunately, in the tech space, 99% of the paid collaborations are part of a scam called a link-building scheme.
The “sponsors” approach you and pay for you to publish a blog post on your site. All they care for is that you leave a link to their product.
But this can lead you into serious trouble as Google disallows building links like this.
So if you’ve been approached by a sponsor, forget about it. I’ve had 10,000+ “sponsor requests” none of which were legitimate.
The only way to get legit sponsorships is by being active and approaching companies.
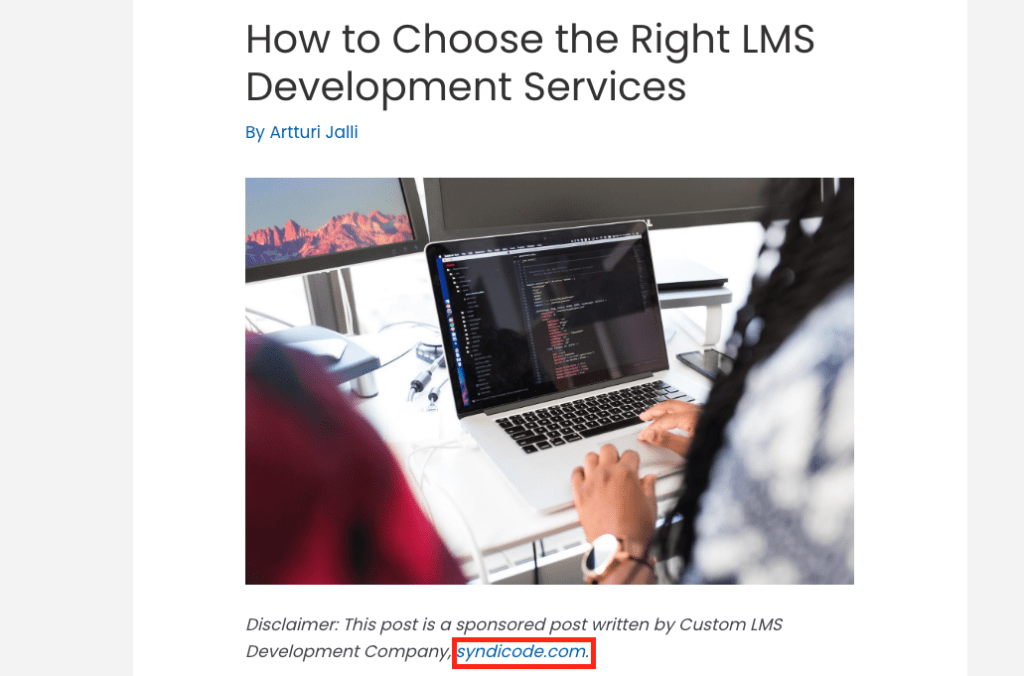
Nonetheless, the idea of a sponsored post is simple.
If you have a big newsletter on your blog or a high number of visitors to your homepage, you can do a sponsor deal with a brand that’s relevant to your niche.
They will pay for you to promote their products.
But these sponsors should be someone whose products you actually trust and would like your audience to use.
5. Info Products
One of the best blog monetization strategies is to sell info products, such as a course or an e-book.
But this requires a big audience, some research, hard work, and marketing. So it’s not something you will probably do in the first year or two.
To test audience interest, you could try promoting someone else’s product (affiliate marketing) to see how it performs.
If you make a ton of sales, it’s time to consider launching your own blog.
For example, on this very site, I’m selling a blogging course.

I offer a ton of free blogging/SEO-related content and then sell the blogging course as a premium product for my avid readers.
6. Accept Donations
Nothing prevents you from accepting donations from your audience.
If you have loyal readers who always come back for more, they might want to buy you a coffee while passing by. 🙂
These days, setting up a donation button on your page is super simple.

- You can use PayPal’s donation feature
- Alternatively, you can set up a “Buy me a coffee” page.
But to make anything significant from donations, you need huge traffic.
Also, it’s ethical to use these donations to build your site. For example, you can renew your domain hosting plan with donations.
Tech Blog Analytics
Understanding your traffic levels and sources is key to sustaining long-term growth.
Make sure to set up Google Analytics on your blog.
From there you can track how many visitors your blog gets.
You get to see a whole bunch of things from Analytics. Most notably, page views, average session duration, demographics, source, and more.
Besides Google Analytics, you should set up Google Search Console.
There you’ll find detailed Google performance reports.
These show trends for keywords you rank for, clicks, and the average position of your pages.
You also get valuable information on why pages appear/don’t appear on search results.
Last but not least, you’ll learn if there are errors you need to fix to appear on Google.
Make sure to set these up at most a couple of weeks after launching your website.
You want to see if your blog strategy is working as early as possible.
If you publish quality content every day, your Google impressions and clicks should start growing in a couple of weeks or months.
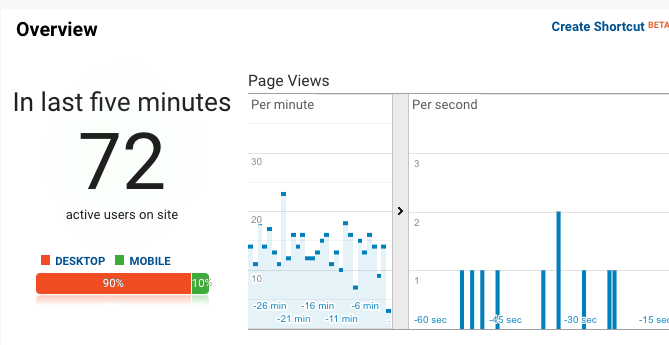
Tip for Analytics
When you visit your site, Google Analytics will show it as a new visitor to your site.
To avoid disappointments, make sure to block yourself from Analytics.
I didn’t do this back when I started. This meant that I thought I had hundreds of visitors even though it was just me…
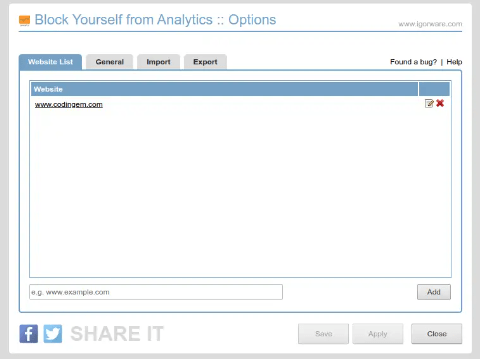
One way to block your own visits is by using the Block Yourself from Analytics extension in Google Chrome.

After installing the extension, you can click on its icon in the extensions bar and add your site to the list of blocked domains.
This will prevent your own visits from being recorded in Google Analytics.
How about SEO?
SEO (Search Engine Optimization) is one of the blogging space buzzwords.
Everyone still talks about it.
But it’s becoming less and less relevant.
How it used to work was that you’d implement some shady tricks to boost your website’s rankings on Google.
This involved strategic keyword placements, building links, and more.
But these days, hacks like these are useless.
If this is your first time hearing the word SEO, awesome! Just skip to the next section—you won’t need SEO.
But for those familiar with the term, let me clarify things to you.
I’ve built a bunch of profitable blogs without doing any SEO.
WordPress and your domain host handle the technical aspects of SEO.
All you need to do is write a ton of quality content that provides value and solve problems.
Each post should be the best resource on the internet.
No SEO strategy can save you from this!
Focusing too much on SEO can be misleading and shift your focus away from what truly matters. Just write a ton. Everything else happens naturally.
FAQ
Last but not least, let’s go through some common blogging-related questions.
How Long Does It Take to Rank on Google?
The process of ranking on Google can take a long time, and there is little you can do to speed it up.
During the first 6 months, I only received a total of 500 visits from Google.
You heard it right—I wrote 50 hours a week for half a year to get 500 reads. That’s about $5 in ad revenue.
As a beginner, you should expect it to take several months to start ranking on Google.
It’s a long grind. Definitely more like a marathon and less like a sprint.
Just write a ton of quality content and you’ll eventually start seeing results.
Do You Need to Be an Expert to Start a Blog?
It is not necessary to be an expert in a particular subject to write an informative blog post about it.
If you have recently learned something new and valuable, you can share your newfound knowledge with others through a blog post.
But don’t lie to your audience. Pretending to be an expert when you’re not is dishonest and will likely damage your reputation in the long run.
How Long to Build 100k+ Monthly Visits?
By working both hard and smart, you might see nice decent success in 6 months.
However, if you don’t work efficiently or only dedicate a few hours per day to your blog, it could take several years to see results.
It’s important to work hard and smart but remember that success is not guaranteed, and it depends on various factors such as the quality of your content and the competitiveness of the topics you cover.
Should I Use AI to Write Blog Posts?
Just use it as your assistant.
AI cannot really provide value or write content that would rank on Google.
AI tools can be used to rephrase sentences or conduct basic research, but the creation of something entirely original still requires a human touch.
AI may write faster, but the groundwork is still the hard work that takes time—and it’s something you can’t avoid.
The idea is that you become an expert in your niche.
This makes it easy for you to write truly unique and original content—fast.
Wrap Up
Starting a successful tech blog is a long journey. It requires hard work, dedication, and perseverance.
You need to write hundreds of quality posts for your blog!
Treat each blog post like a tiny business. Make it so good that there’s no need to search for an alternative. This is what makes Google love your site too!